Advance Prototyping of the InteractiveTutorials Gem for O3DE
| September 7, 2022
Hi! I’m Madeleine, an Amazon intern working on Open 3D Engine (O3DE). My summer project focused on advanced prototyping of the InteractiveTutorials gem. This prototype teaches users how to work with Open 3D Engine, right in O3DE Editor. As users work through tutorials, the tool highlights the parts of the interface used at each step. So far, I’ve added several features and scoped out future improvements, including automating tutorials and making them easier to navigate.
Learning Through Doing
The InteractiveTutorials gem is written in Python, which I have some experience with from university and previous work at a startup. However, I didn’t have any experience with Qt, the library that InteractiveTutorials uses for UI widgets. Also, part of my project also involved pulling scripts from the O3DE codebase to use in InteractiveTutorials. I wasn’t familiar with C++ and my previous experience with Python was tightly bounded along the constraints of classroom projects, which are much easier to complete than the open-ended challenge of understanding and improving a large existing repository.
My first project was an automated stepcounter. Formerly, the current step index within each tutorial was manually written at the end of each step. This could be tedious in tutorials with 20+ steps, such as the PhysX Rigid Bodies Tutorial, and steps could easily be miscounted. Keeping track of the current step index, I added a label which printed the current step relative to the total number of steps in the tutorial.
From there, I began to work on the tutorials themselves. Keeping with the Rigid Bodies tutorial’s theme of PhysX, I wrote tutorials describing how to create wind forces, process PhysX collider assets, decompose input meshes, and customize mesh assets. These tutorials already existed on the O3DE website, but having minimal previous experience with documentation writing, especially for game engines, I wasn’t exactly sure of the best practices for writing. I have experience with both coding and writing nonfiction, so I generally thought that documentation writing wouldn’t be very difficult. That’s not true! Knowing how much information to include in one step, how much background to give about the general function of different components and assets, or even what tense to use - none of this is intuitive. It takes extensive familiarity with documentation and with video games to create a tutorial which seems seamless or simple. It turns out that one of the best ways to learn is by doing: trying and failing and mimicking those who already know. After lots of edits, my wind forces tutorial was added to the gem.
Many of the icons referenced throughout the tutorials are small and have low visibility even when they are highlighted. I decided as a stretch goal to investigate the current highlight implementation and propose improvements. I moved on after adding my wind forces tutorial was merged, even though I still had a few tutorials left as open PRs. I knew I could always come back to those PRs and I was interested in adding more broadly applicable improvements to the gem.
At the time, another limitation of InteractiveTutorials was that it used a module located in the AutomatingTesting project. This mean that it could only be run from within AutomatedTesting. I helped move the module from its previous location in AutomatedTesting to within the QtForPython gem. Now the module, and the InteractiveTutorials gem, would be more widely usable. After talking to the testing Special Interest Group, we created a Request for Change, which was approved. I was impressed with the importance of communication and clarity, especially when a codebase as large as O3DE’s.
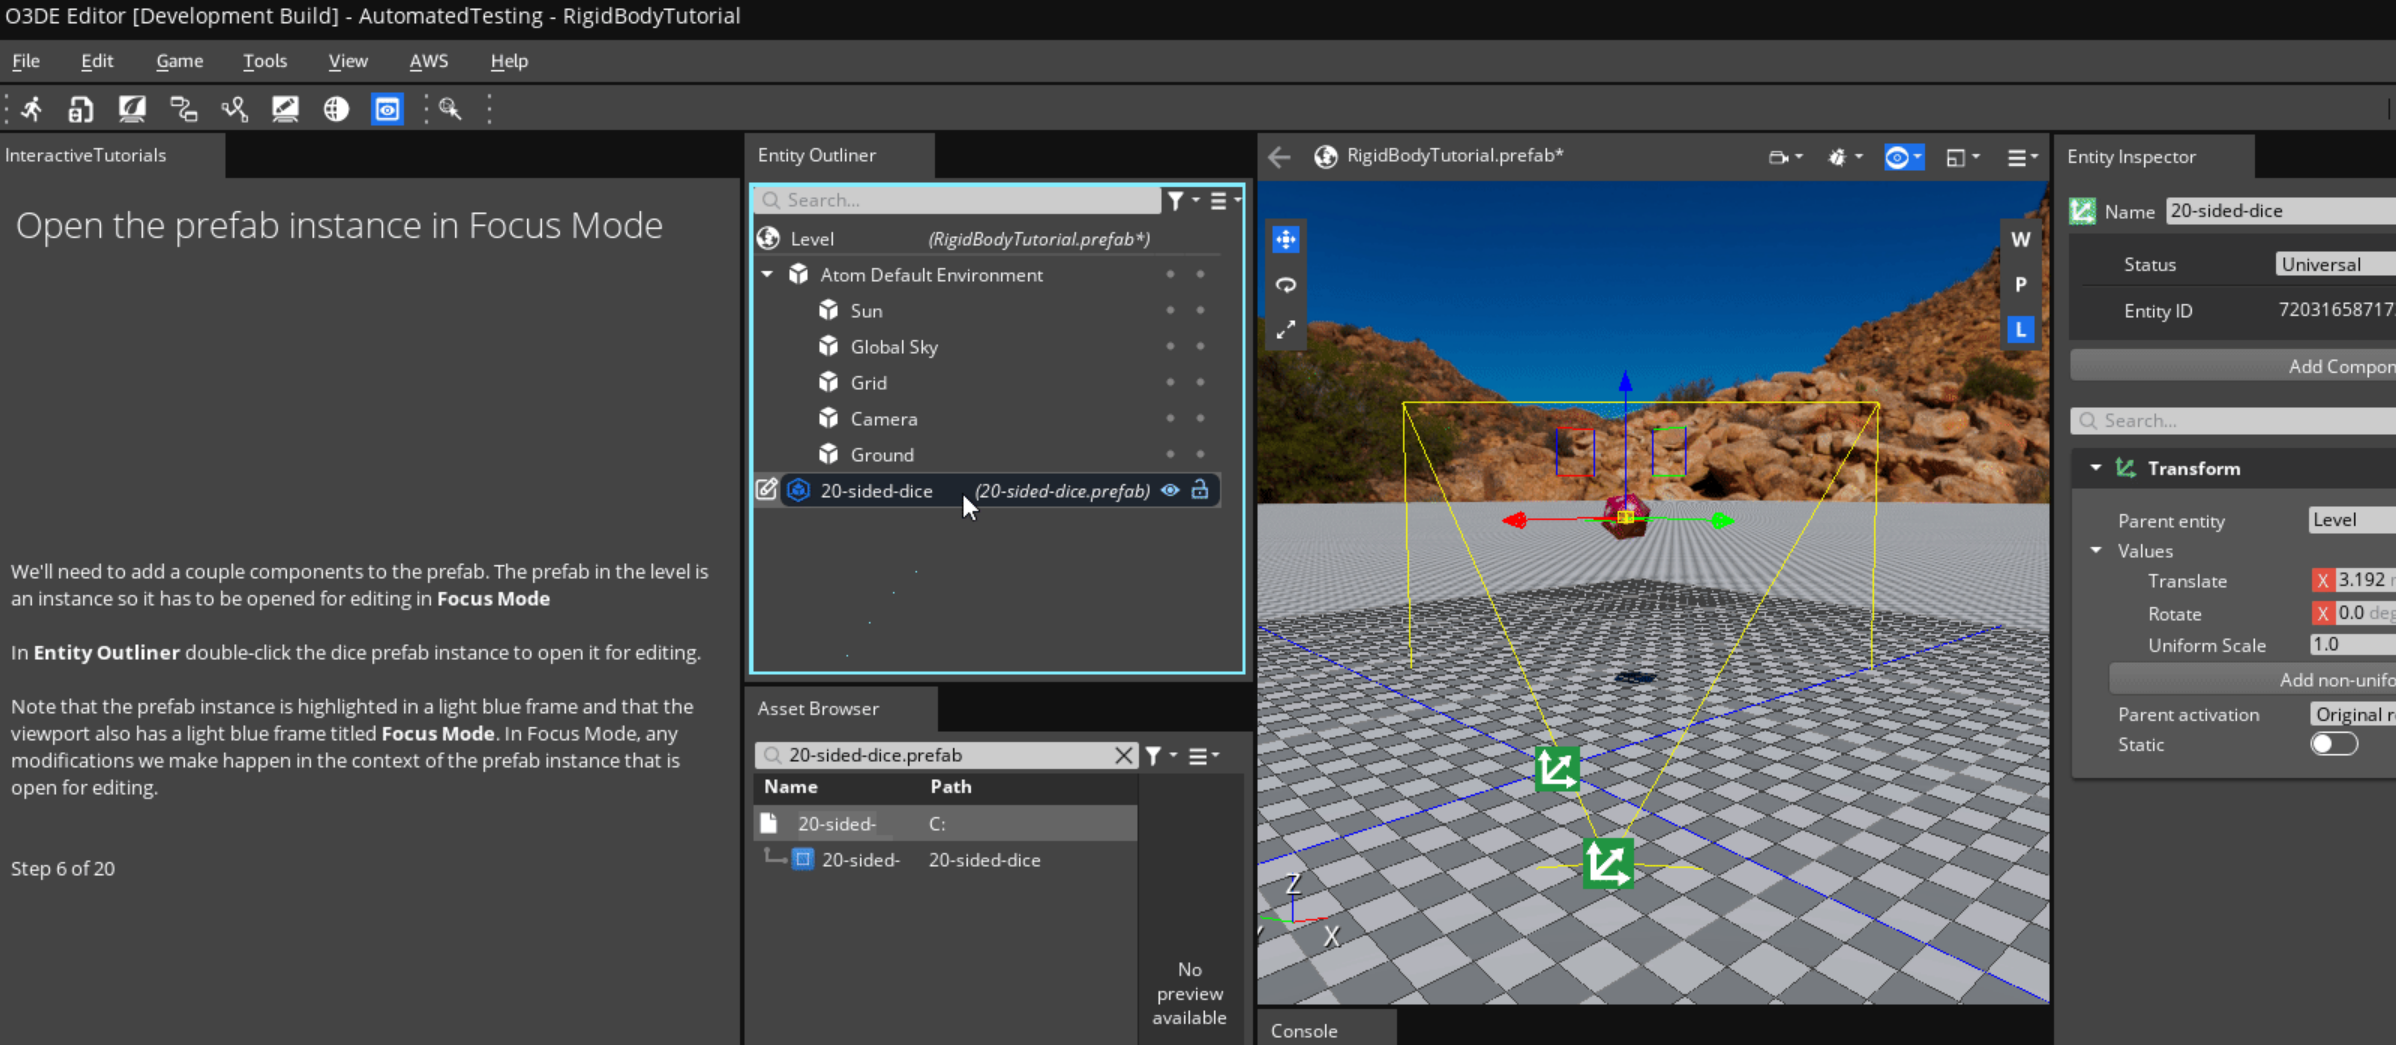
Although the content of InteractiveTutorials is detailed and concise, there was no way for users to definitively conclude whether or not they had correctly followed the instructions. Automating the result of a tutorial would be helpful both for new users unfamiliar with the editor and for returning users who knew what they wanted but didn’t want to have to click ‘Next’ 20 times to get the result. I decided to try automating the PhysX Rigid Bodies Tutorial. Rigid bodies are dynamic solid objects that simulate reactions to collisions. The goal of the tutorial was to create a simulation with collisions by by adding components and colliders to an existing prefab.
My first move was to create a ‘Simulate This Step’ button which, when clicked, would produce changes in the editor corresponding to those described in the tutorial up to that point. I went digging in the AutomatedTesting project for scripts. Some scripts, like those to create an entity and enter game mode, were easy to simulate, but other parts were quite difficult. The 21 written steps of the tutorial also didn’t each correspond to a runnable script. I identified 8 discrete parts of the tutorial, some comprising of several steps. Each discrete part could run whether or not the other parts had been run.
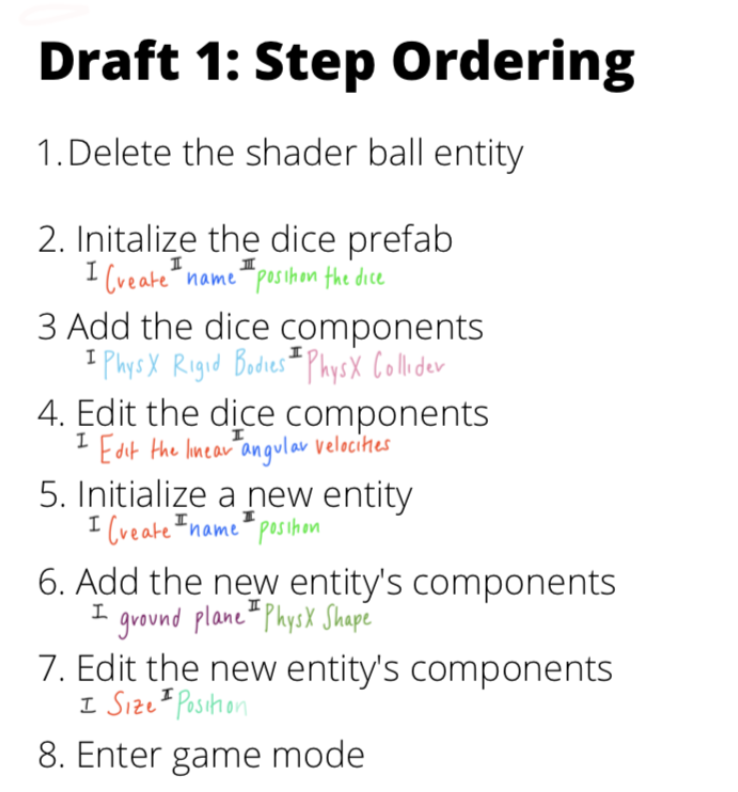
When I began working on creating functions for each ‘part’, however, I soon realized that many of the parts I had identified as independent do in fact depend on each other. For example, you can’t add a component to an entity until entity has been created. This presented a significant issue when users expect to be able to move backwards and forwards through tutorial steps.
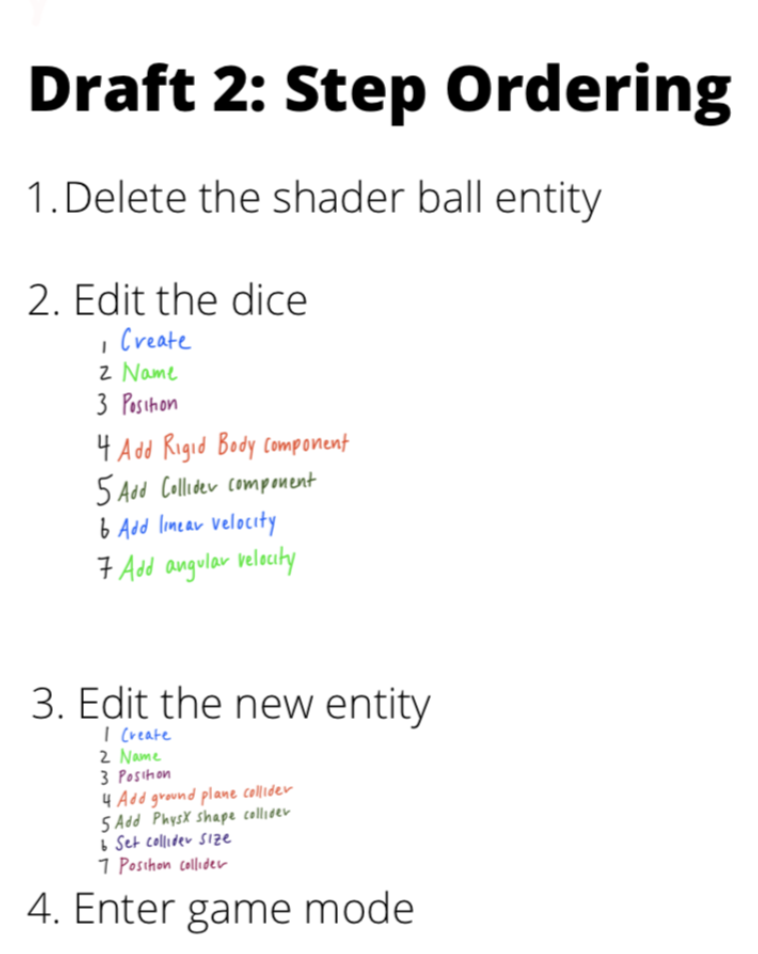
This was a problem because I couldn’t be certain of the state of the dice prefab in step two. In some scenarios, knowing which sub-steps have been simulated is not possible without creating giant if-statements and many near-identical state variables, but this solution is both inefficient and not applicable to other tutorials.
I risked creating duplicate entities or potentially breaking the tutorial by trying to edit entities which didn’t yet exist when the ‘simulate’ option was selected. I knew I could solve the problem by condensing the tutorial into three giant steps, but that seemed inefficient and also unhelpful for the user. I decided to create a ‘simulate last step’ option which displayed the completed result of the tutorial as a reference for the user.
Finally, as part of my stretch goal, I worked on improving the highlights UI using Qt. My focus was to improve the visibility of small widgets. I came up with 3 new highlighting options, depending on the size of the widget and the color of the background. First, the content of the widget itself could be shaded either blue or red. Also, the parent widget could also be highlighted. Finally, I explored adding a blinking / pulsing effect.
Looking Back, Looking Forward
One Amazon Principle that has stuck with me is Learn and Be Curious. I saw an example of this principle in the inception of the InteractiveTutorials gem as the brainchild of one developer and in my mentor’s suggestions for how the gem could be improved, and I attempted to emulate it by trying to solve problems that I’m still not sure are solvable.
For future work on automation, I would suggest working bottom-up rather than top-down. I would attempt to automate a very simple tutorial, such as “Create an Entity”. From there I would try to develop a general purpose solution for automation. I would also consider using an abstract data type to memoize or keep track of the current-step-index and the last-simulated-step index, since many problems which rely on consecutive if-else gates can also be solved dynamically. Finally, instead of keeping track of the last-simulated-step-index, I would consider using some of the Python Tests in O3DE to determine which entities have already appeared and been edited. If a test returns False, then the entities it tracks must not have been created yet. An advantage of O3DE being open source is that I can continue to learn and be curious about this project long after the summer’s over.
This may sound trite, but I’ve genuinely enjoyed my summer at Amazon, and I’m so thankful not only for the opportunity to write here, but also to have been part of a team that encouraged and challenged me to work with rigor and attention to detail.