Explore Multiplayer Gaming with the O3DE Multiplayer Sample - Now Available!
| May 3, 2023
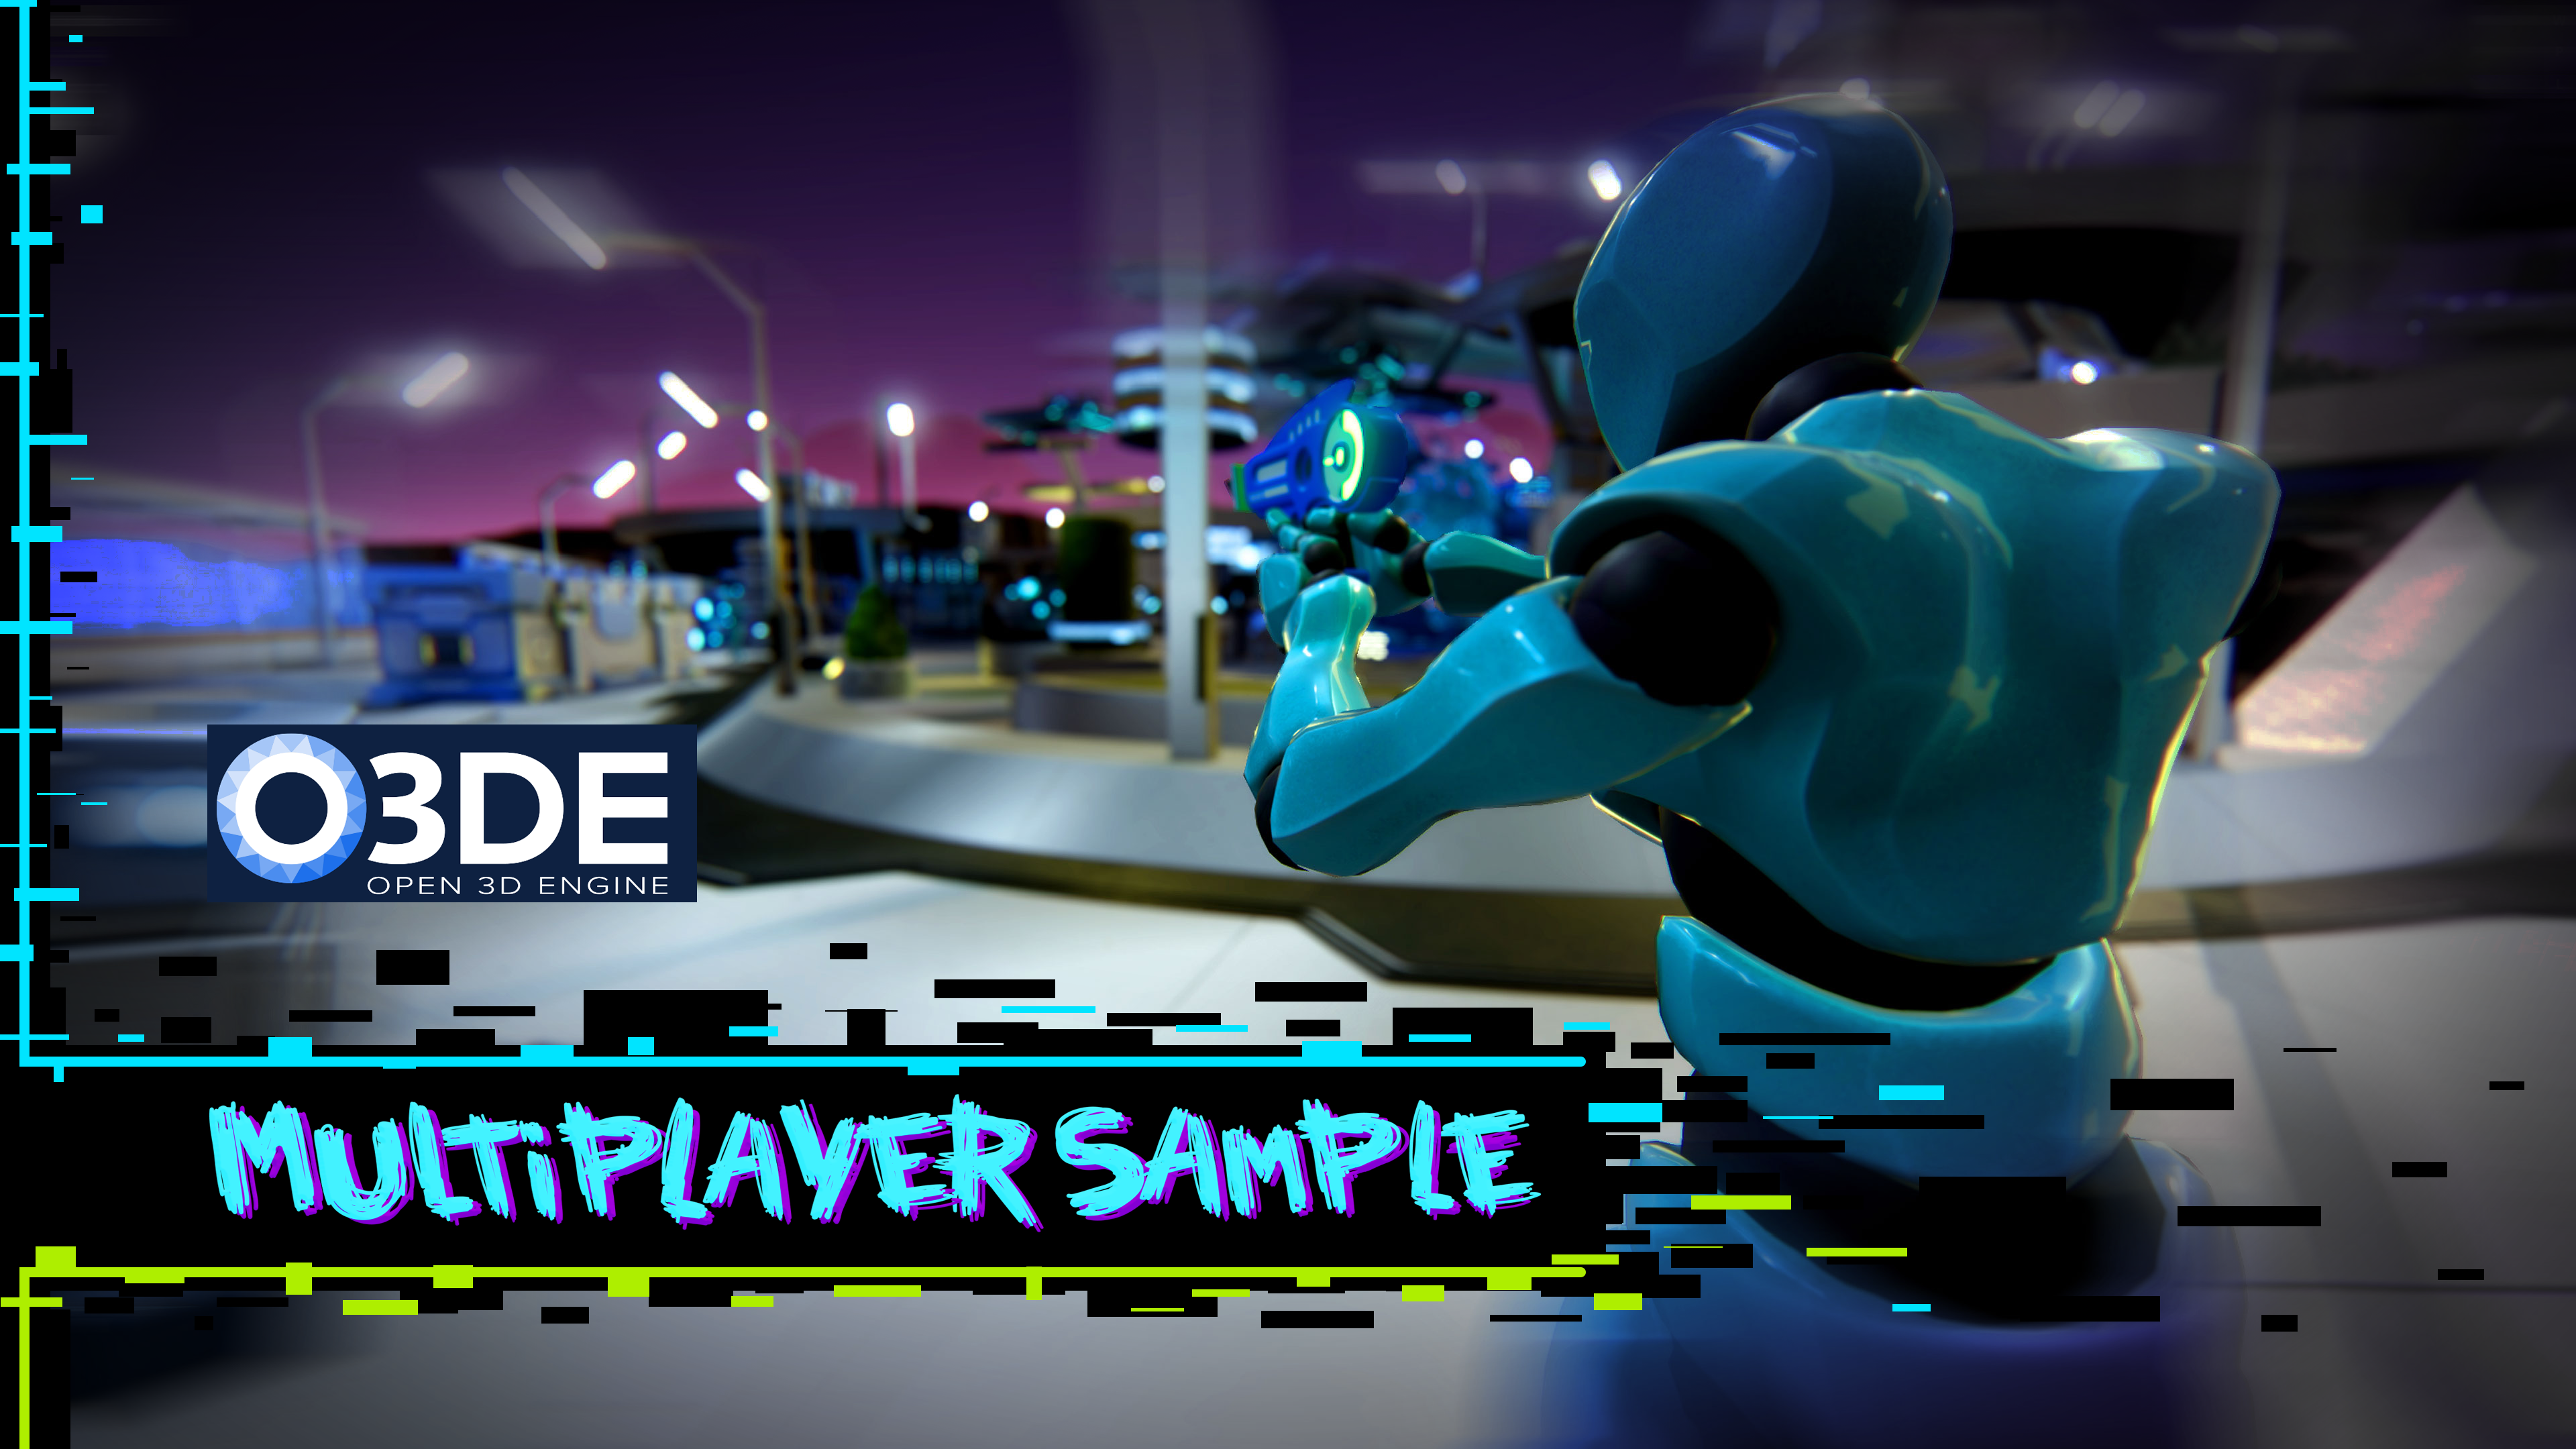
We are happy to announce the release of the O3DE Multiplayer Sample Game (MPS). The MPS is a fully open source mini-game where players battle one another for dominance in a multi-tiered, under-construction, Starbase. This new sample game is intended to serve as an example for the O3DE community to use in the creation of other games as well as to demonstrate a number of features in O3DE, including networking, material canvas, and the setup of visual effects setup using the PopcornFX gem , and audio effects using the WWise gem .
The design intent of the MPS was to create something that would be fun to play, feature exciting exploration that rewarded player mastery, have clear risk vs. reward elements, and feature both player vs. environment, and player vs. player gameplay. We also wanted it to be highly configurable and expandable so that the O3DE community continue to iterate and add to it. From a technical angle, we also wanted a multi-faceted game that would provide a platform to test against when adding new systems to O3DE.
It is best to think of the MPS as a starting point and a toolbox of new features. We encourage you to get creative in how you expand it, adjust it or use its various features to create wholly different games. We look forward to seeing what you make of it!
Partners & License Terms of Use
This sample was created through a partnership between AWS Gametech, Adobe, KitBash3D and the O3DF.
- The use of the Y-bot character model as well as the animations contained in character_mps gem are subject to the license terms included in the character_mps Gem.
- The use of Kitbash3D High Tech Streets Kit are subject to the license terms included in the kb3d_mps Gem.
Installing and Running the O3DE Multiplayer Sample Game
In order to setup and build the MPS you will need to get follow the setup instructions for these two repositories:
Multiplayer Sample Game Design
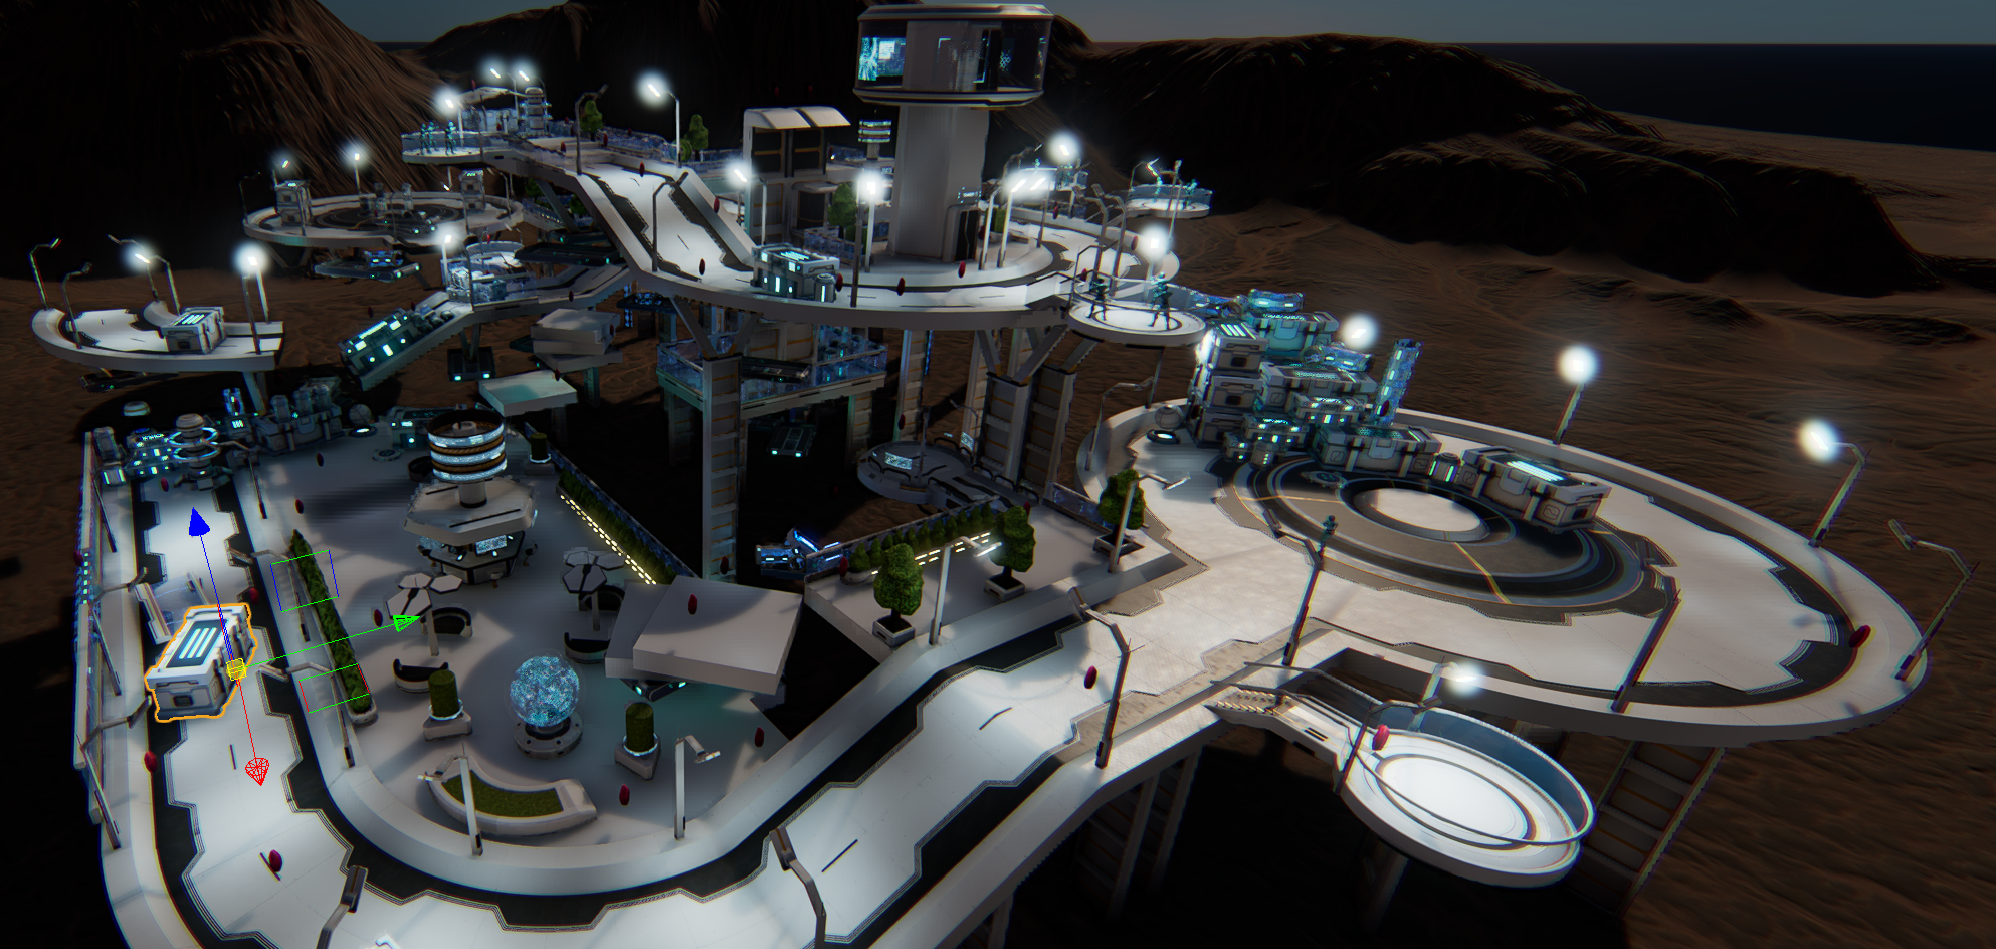
MPS features player vs. player combat in a challenging environment. Players compete to collect gems and earn as many points as they can before the match ends. Players are protected by energy shields. When a player is shot, their shield takes damage. Once a player’s shield is depleted, they drop some of their gems for other players to collect and respawn at the cost of some of their accumulated points.
Gems & Rounds
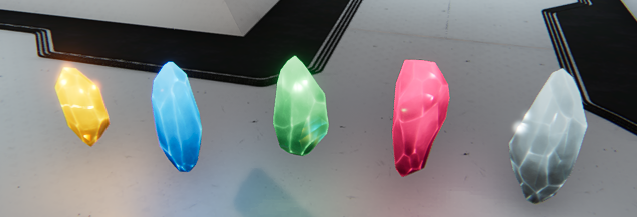
Floating gems of various colors are scattered around the starbase. Players earn points by walking though the gems to pick them up. The value of a gem is determined by its color. There are 5 gem types: Yellow (1 Point), Blue (3 Points), Green (7 points), Red (10 points), White (20 Points). These values are tunable from within the match controller component. Some of the more valuable gems can be found in hard-to-reach areas or areas where it is easy to fall out of the level, or both! We encourage you to explore the level and find all of the gems.
Each match is comprised of multiple rounds (3 by default) that last 2 minutes each. The number and duration of rounds is easily configurable in the match controller component. Gems respawn between rounds. Each round can spawn different types of gems. The default per round gem spawn tables look like this:
Multiplayer Sample Configuration
There are a number of new components that are part of the MPS Setup. Within these components you can adjust many aspects of the game, including length of match, respawn penalties, and how and when certain gems spawn.
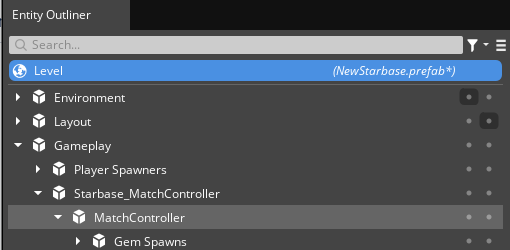
Match Controller Component Configuration
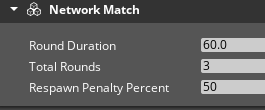
Network Match With this component, you can set the length of the match and the point penalty applied to each character that is forced to respawn during the round.
- Round Duration - Set the duration of each round.
- Total Rounds - Set the number of rounds. When all rounds are completed, the match ends, so this serves to dictate the length of each match as well.
- Respawn Penalty Percentage - Set the percentage of the player’s accrued points that are lost when they are forced to respawn, either by losing all of their shields or falling out of the level. This number can be set to 0 if desired, eliminating any respawn penalty.
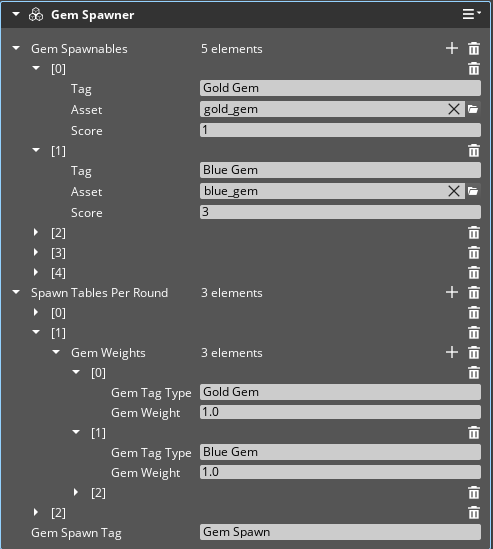
Gem Spawner In this component you can setup the gem types, gem point values, and set which gems spawn in each round.
- Gem Spawnables - In this property group, you can create gem spawnables and set a tag, asset reference, and point value for each one.
- Tag - This value is referenced in the per round spawn tables as well as individual gem spawn points to spawn this gem spawnable.
- Asset - Sets the asset to use for this gem spawnable.
- Score - Sets the point value for this gem spawnable.
- Spawn Tables Per Round - Here you will use the Tags from the gem spawnables table to setup gem spawns for each game round. Starting with round [1] you can set the type of gems that spawn during that round. A round can include any or all of the available gem spawnables. Note: Spawn Table [0] is not used.
- Gem Tag Type - Specifies the gem spawnable to spawn by referencing its tag.
- Gem Weight - If a spawn point (see below) calls two or more different gem spawnable tags, this value influences which of those gems spawn.
- Gem Spawn Tag - Used in Gem Spawn Points to reference this Gem Spawner (see below).
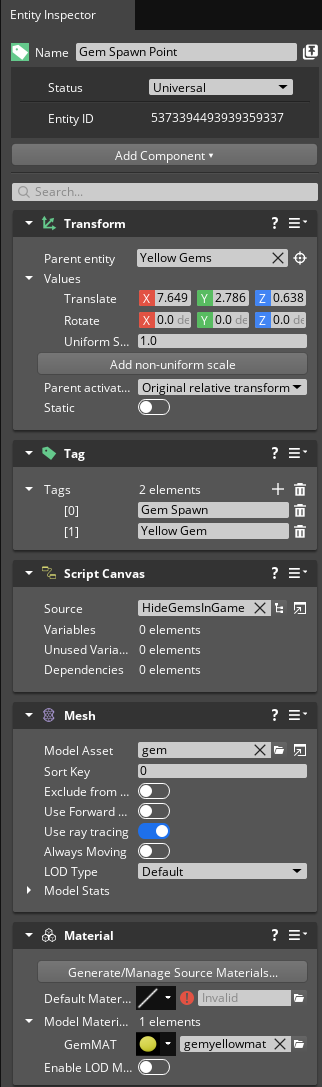
Gem Spawn Points Gem Spawn Points should be created wherever you want a gem to appear in the level.
- Transform - The location of the gem spawn point.
- Tag - The tag(s) that correspond with the gem(s) you want to spawn from this spawn point. You can add more than one gem type to the spawn point by adding entries and entering tag values from the Gem Spawnables table. When more than one gem spawnable tag is referenced, the Gem Weight value influences which gem spawns. For example, if you add yellow and green gem sapwnables and give each a weight of 1, there is an even chance of either to spawn. If one is set to greater than 1, that gem is more likely to spawn.
- Script Canvas & Mesh & Material components - By default, gem spawn points have no visual indicator in the editor as gems only appear when the game runs. To visualize gem spawn points in the editor, the Mesh and Material components assign the gem model and a material that matches the gem that appears in game. When the game runs, the script canvas component hides the gem visualization mesh.
Setting Up Teleporters
Teleporters are another new feature introduced in the MPS. These can be setup to teleport players any where in the level when they pass through the teleport volume.
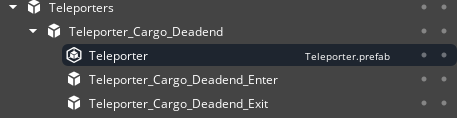
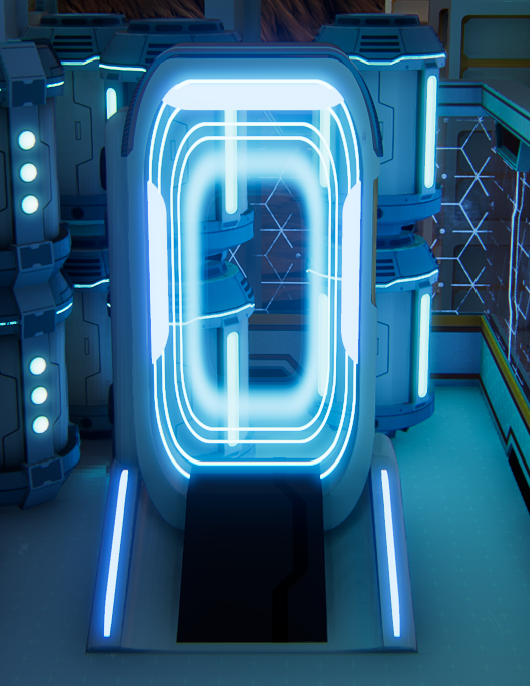
Add the Teleporter Platform asset to the level
- In the asset browser, navigate to \o3de-multiplayersample-assets\Gems\level_art_mps\Assets\Teleporter_Platform
- Select the Teleporter.prefab and drag it into the level at the location you want it to appear.
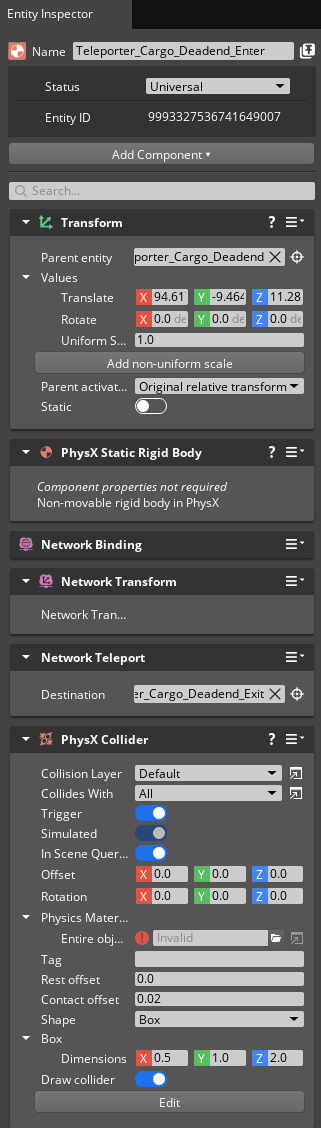
Add the Teleport Enter Volume
- Create a multiplayer entity in the level near the teleport platform and name it. Including the word ‘enter’ in the title is helpful in order to differentiate it from the exit point.
- Add the network teleport component to the multiplayer entity.
- Add the PhysX collider component and its dependency, the PhysX static rigid body component to the multiplayer entity.
- In the PhysX collider component, turn the Trigger option on and then choose the box shape. Set the box dimensions to 0.5, 1, 2. This will fit snuggly into the Teleport Platform doorway. Turn on Draw Collider so you can see the volume.
- Align the volume with the Teleport Platform doorway.
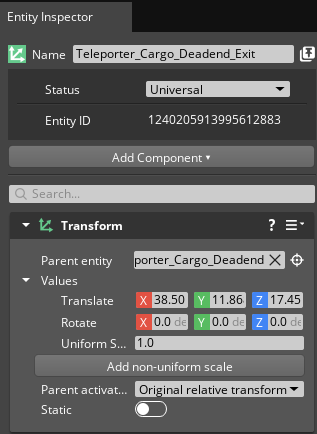
Add the Teleport Exit point
- Create an entity in the location you want the teleporter to exit and name it. Again, using the work ‘exit’ can be helpful.
Link the Teleport Enter Volume with the Teleport Exit Point
- Select the Teleport Enter Volume.
- In the Network Teleport Component, hit the target reticle symbol and then select the Teleport Exit Point in the entity outliner.
You should now have a functioning teleporter! This describes the standard teleport setup, but feel free to experiment with the location and size of the teleport volumes.