Writing Custom Effects for the Editor Mode Visual Feedback System
| May 7, 2023
In this blog post, AWS engineer John Coimbra Walsh will show you how you can implement your own editor state effects using the Editor Mode Visual Feedback system.
The Editor Mode Visual Feedback system allows for the creation of custom, post-processing effects in the viewport to display important feedback about viewport editing workflows. As we will see in this tutorial, adding more feedback effects is a straightforward process.
Project structure
Below is the project structure for the effects we will be using in the following steps. The files suffixed with (new) will be newly created in the steps whereas the files suffixed with (modify) are existing files to be modified.
o3de
├─Gems
  ├─AtomLyIntegration
    ├─EditorModeFeedback
      ├─Assets
      │  ├─Passes
      │  │ ├─Child
      │  │   ├─EditorModeFeedback_ChildPassTemplates.azasset (modify)
      │  │   ├─ExampleEffect.pass (new)
      │  ├─Shaders
      │    ├─ExampleEffect.azsl (new)
      │    ├─ExampleEffect.shader (new)
      │    ├─EditorModeCommon.azsli (modify)
      │
      ├─Code
        ├─Source
        │ ├─EditorModeFeedbackFeatureProcessor.cpp (modify)
        │ ├─Pass
        │  ├─State
        │    ├─ExampleEditorState.cpp (new)
        │    ├─ExampleEditorState.h (new)
        ├─editormodefeedback_editor_files.cmake (modify)
Step 1: Adding a new editor state
First things first, we need to add a new EditorState child class that will implement logic to determine which entities will be rendered to the mask, what parameters will be exposed for control in the Editor GUI and which effect passes will be chained together for the final effect. Our class will start out as a very minimal class that uses the existing tint effect (as used by the FocusedEntity state) that applies it to everything in the viewport:
ExampleEditorState.h
#pragma once

#include <Pass/State/EditorStateBase.h>

namespace AZ::Render
{
    class ExampleEditorState
        : public EditorStateBase
    {
    public:
        ExampleEditorState();

        // EditorStateBase overrides ...
        AzToolsFramework::EntityIdList GetMaskedEntities() const override;
    };
} // namespace AZ::Render
ExampleEditorState.cpp
#include <Pass/State/ExampleEditorState.h>

namespace AZ::Render
{
    ExampleEditorState::ExampleEditorState()
        : EditorStateBase(
            EditorState::FocusMode,
            "EditorStateTutorial", // Give this state a unique, human-friendly name
            PassNameList{ AZ::Name("EditorModeTintTemplate") })
    {
    }

    AzToolsFramework::EntityIdList ExampleEditorState::GetMaskedEntities() const
    {
        // For now, apply this effect to everything in the scene
        return {};
    }
} // namespace AZ::Render
The next thing we need to do is add this state to the EditorStateList in the EditorModeFeatureProcessor that is passed to the EditorStatePassSystem. The order in which the states are added will determine the order in which concurrently active editor state effects are rendered. For our state, the ordering isn’t important so we will just place it at the front of the list:
EditorModeFeedbackFeatureProcessor.cpp
#include <Pass/State/ExampleEditorState.h> // Include our new editor state class

// Snip...

void EditorModeFeatureProcessor::Activate()
{
    EnableSceneNotification();

    EditorStateList editorStates;
    //--------------------------------------------------------------
    // Our newly-added editor state
    editorStates.push_back(AZStd::make_unique<ExampleEditorState>());
    //--------------------------------------------------------------
    // Existing editor states
    editorStates.push_back(AZStd::make_unique<FocusedEntityState>());
    editorStates.push_back(AZStd::make_unique<SelectedEntityState>());
    m_editorStatePassSystem =
        AZStd::make_unique<EditorStatePassSystem>(AZStd::move(editorStates));
    AZ::TickBus::Handler::BusConnect();
}
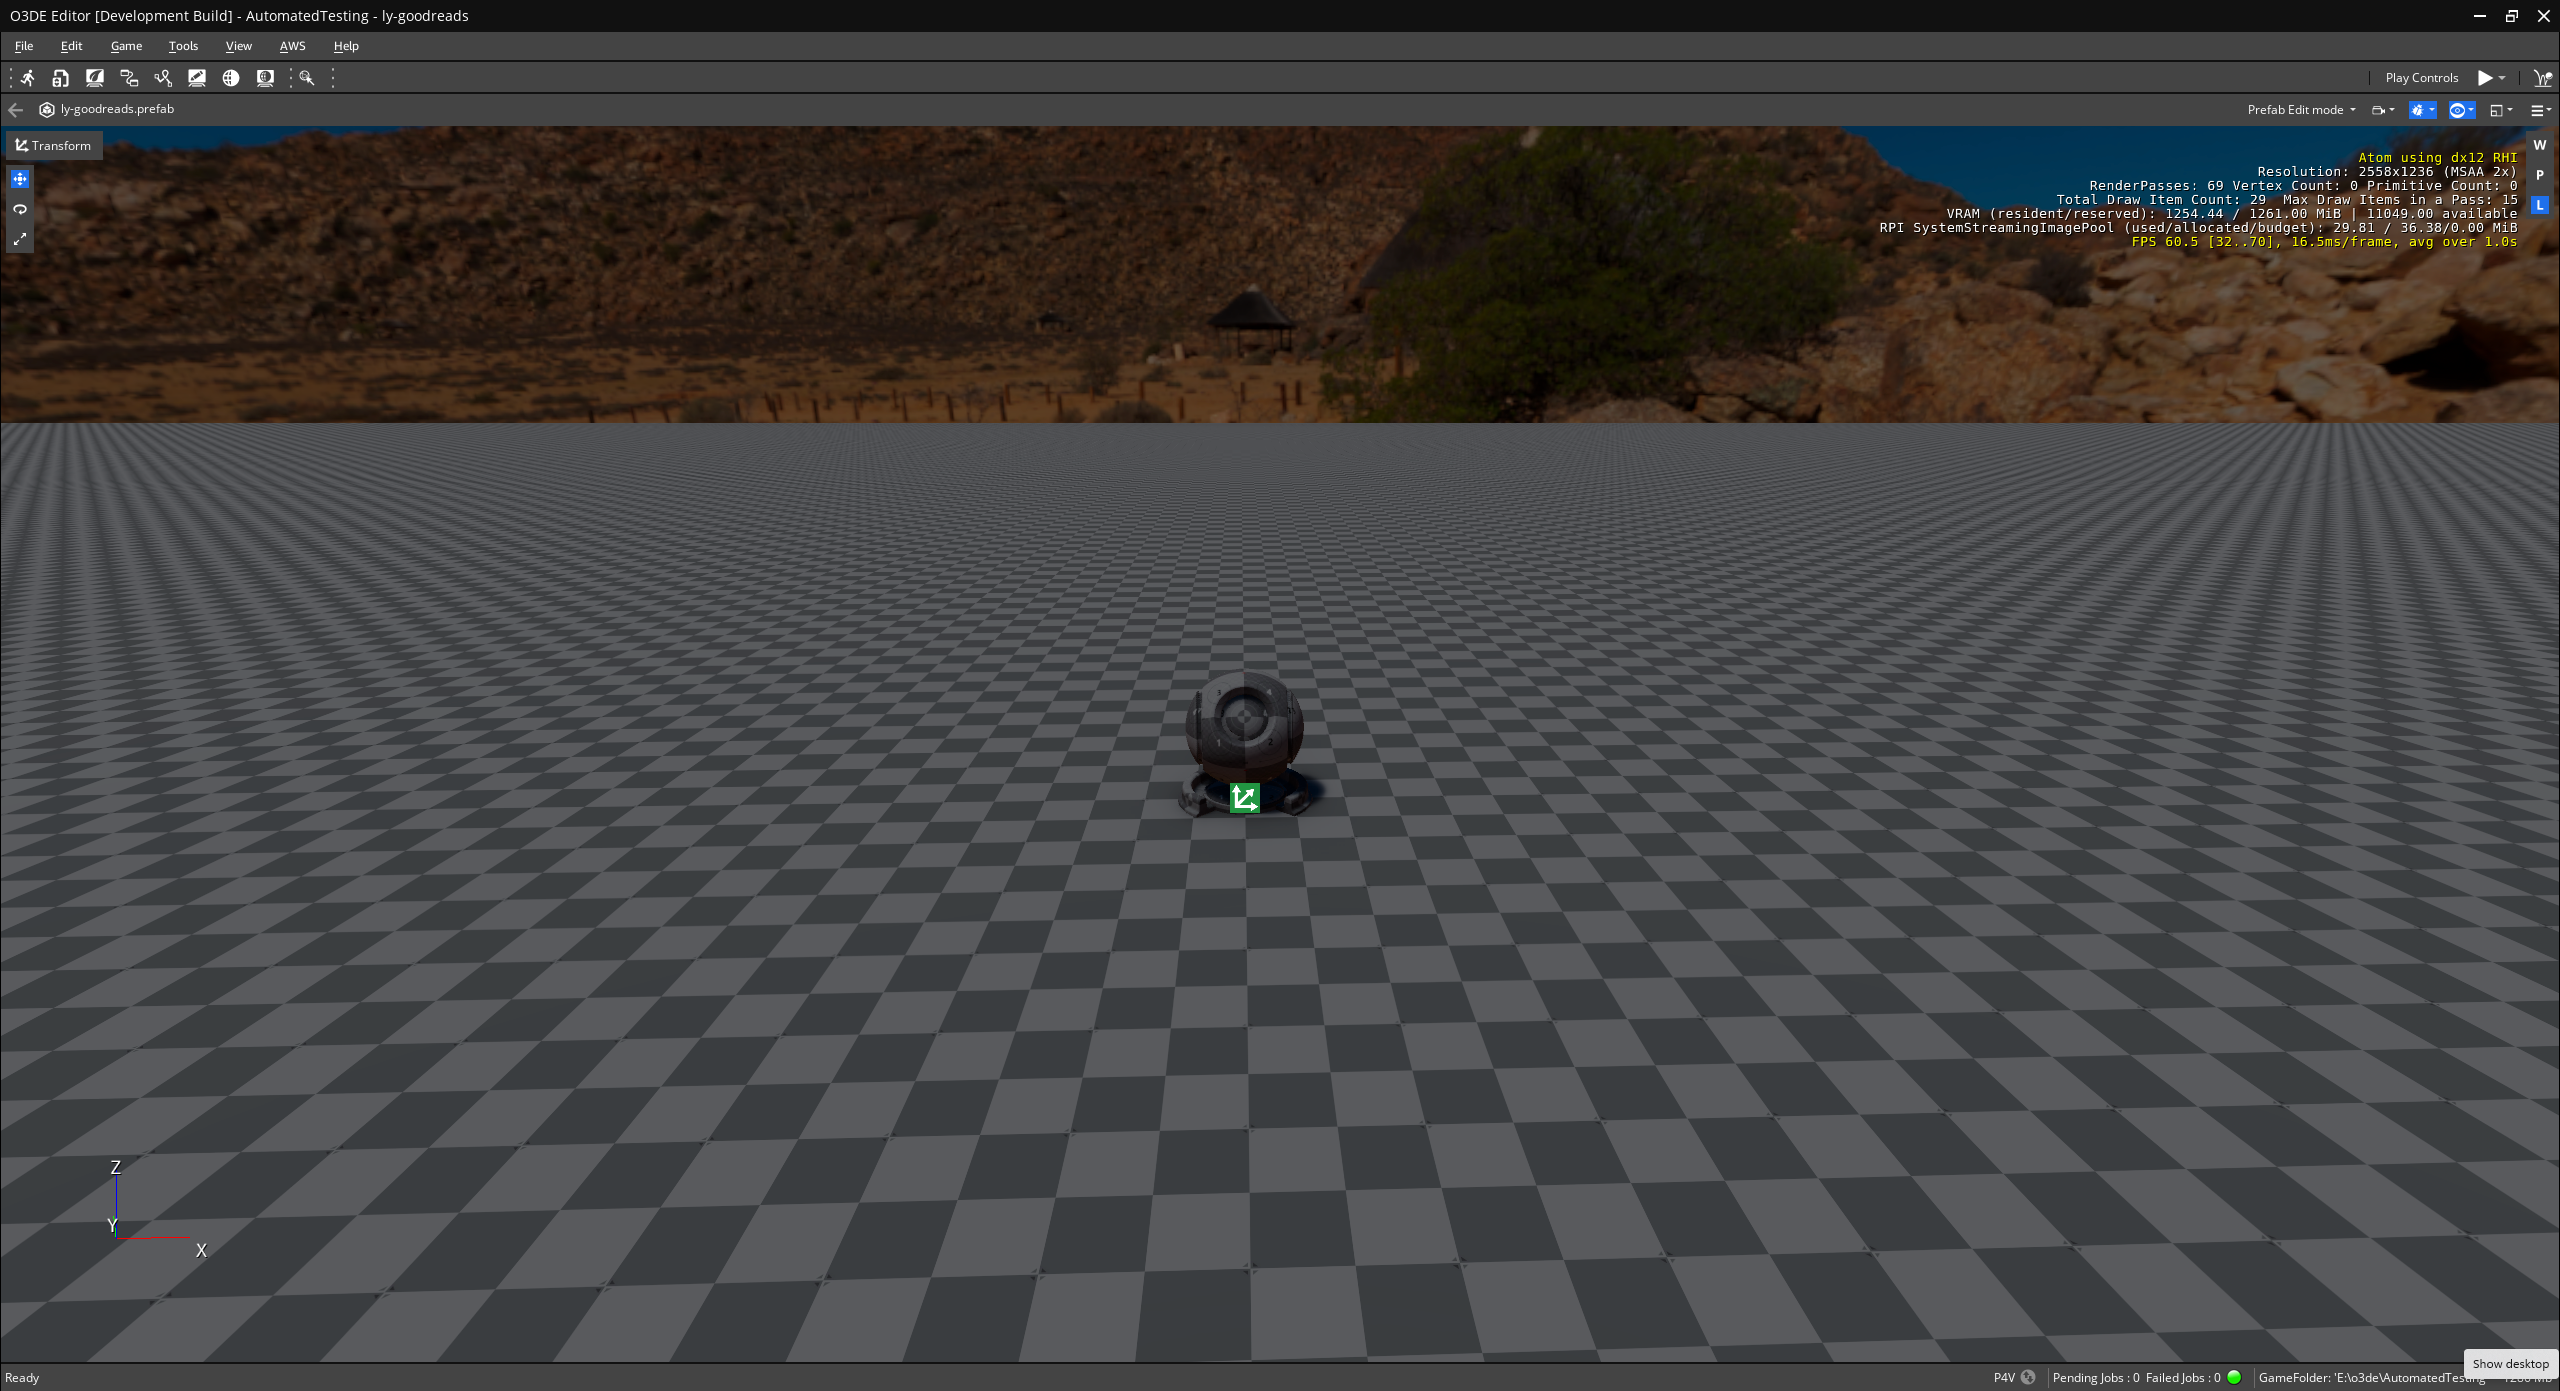
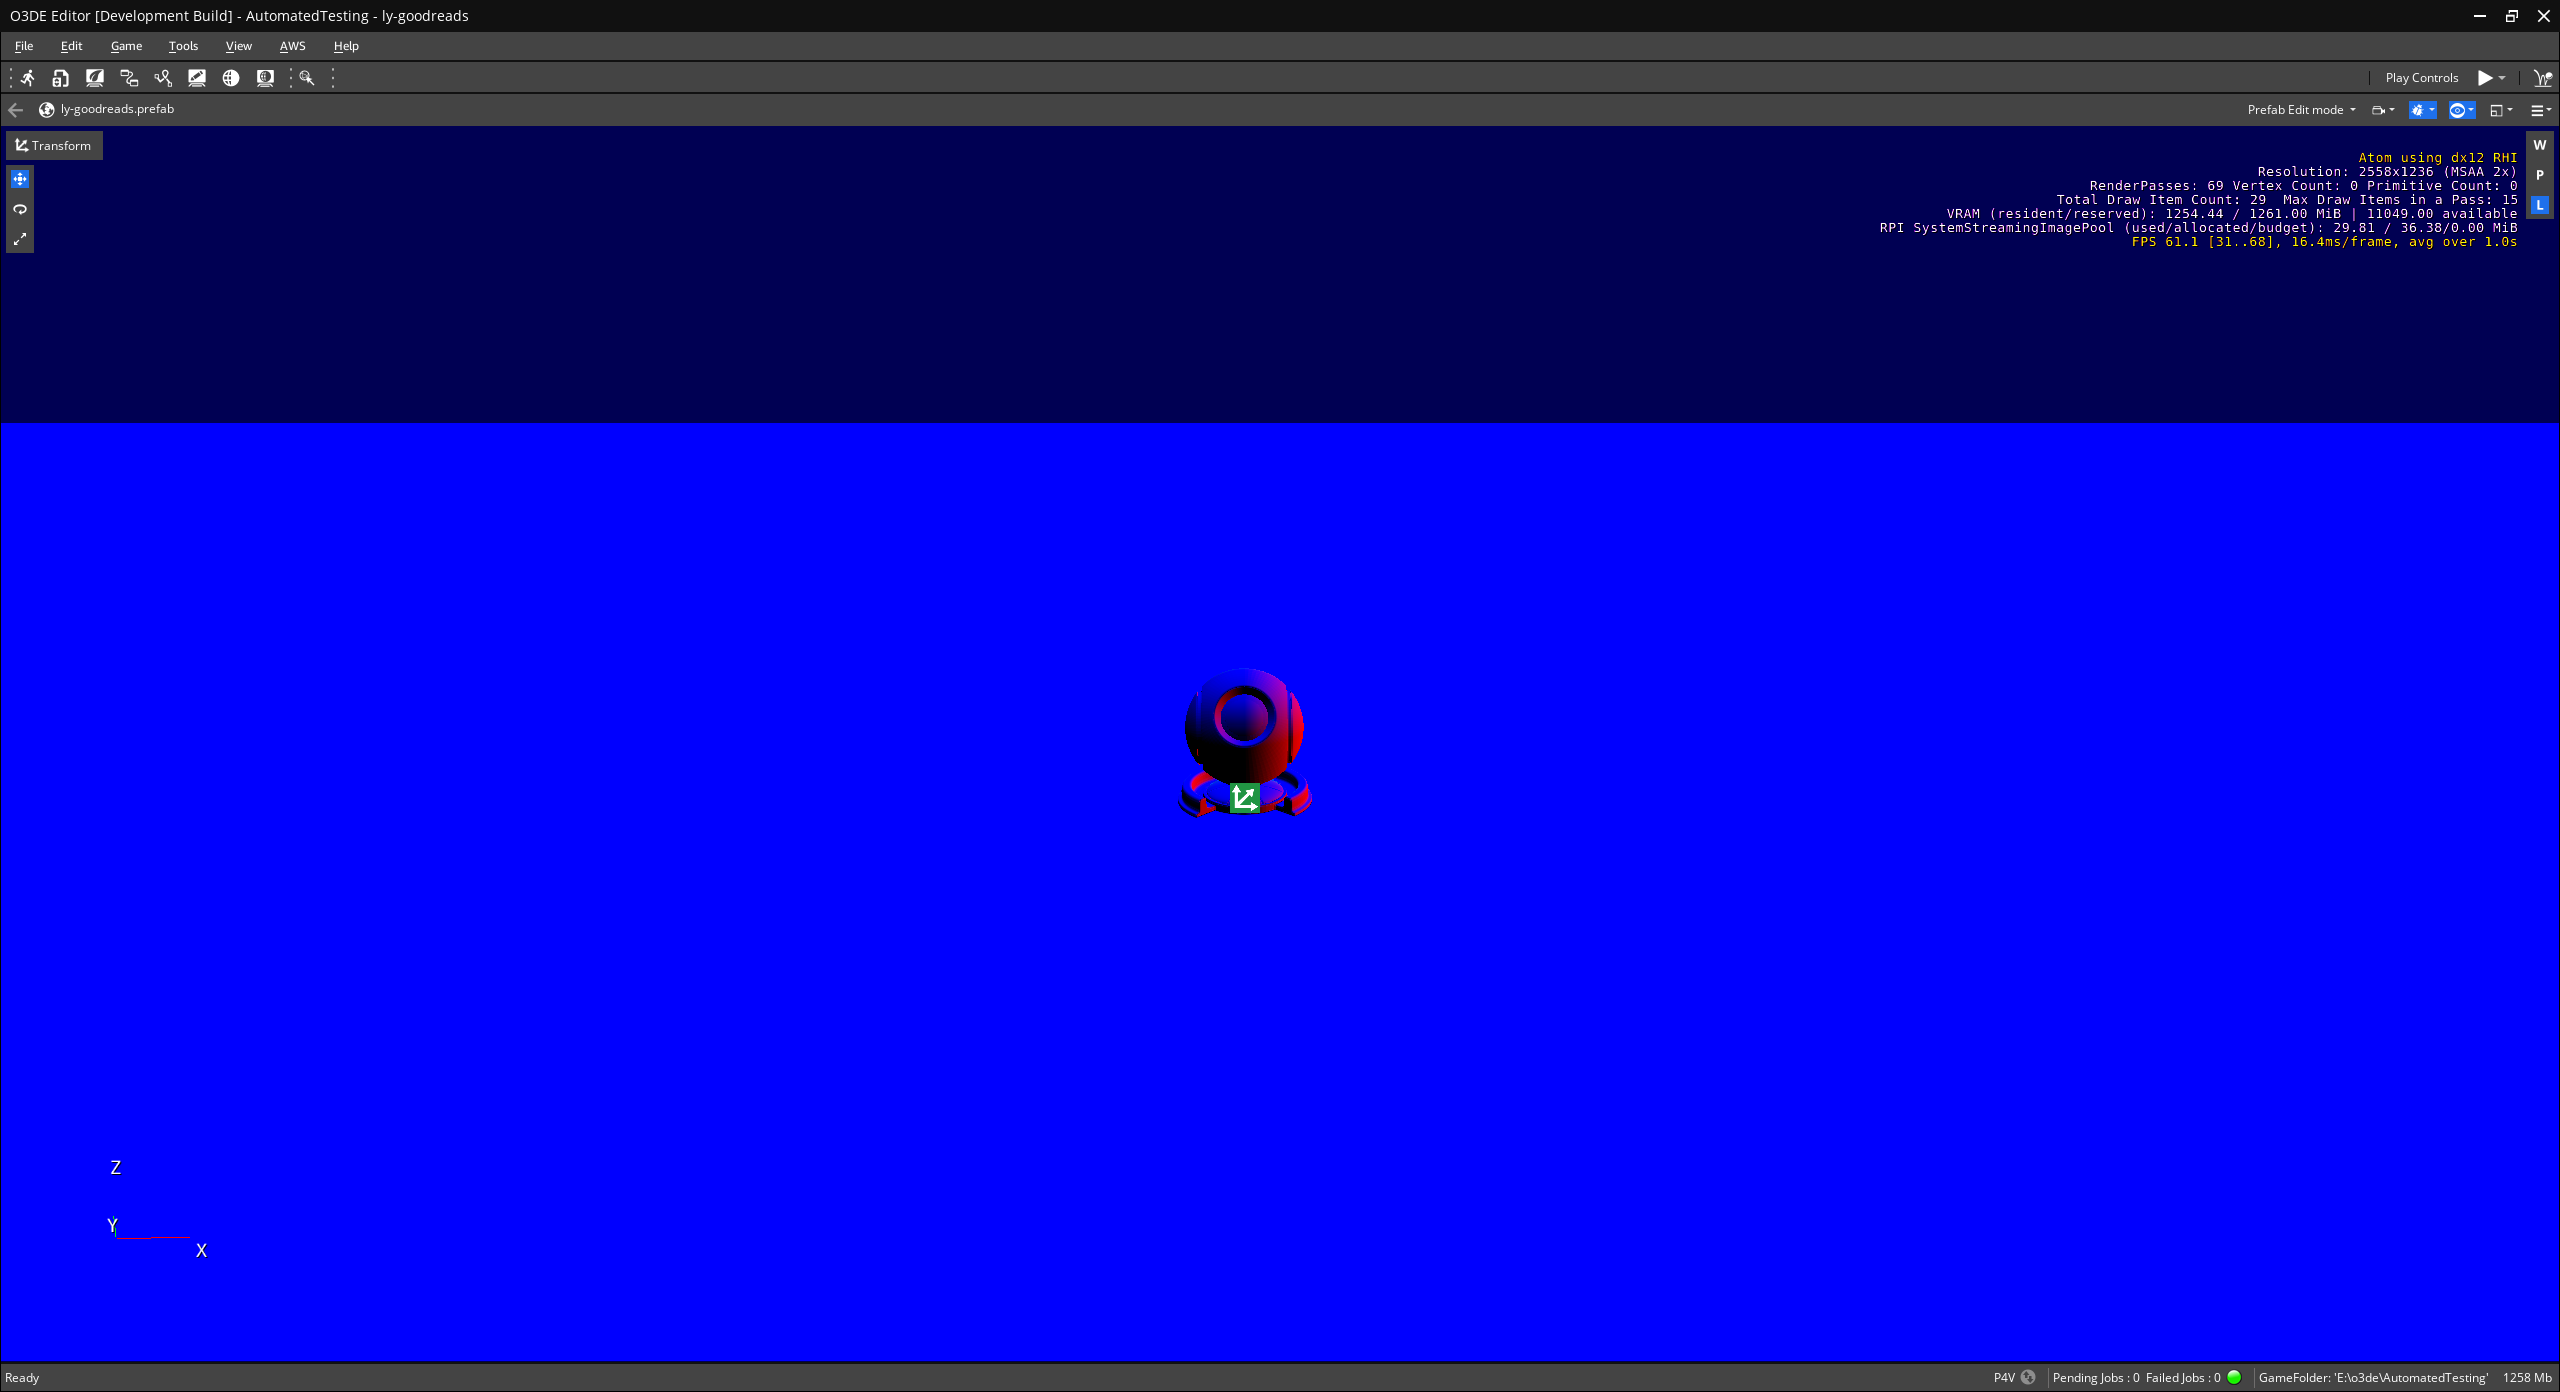
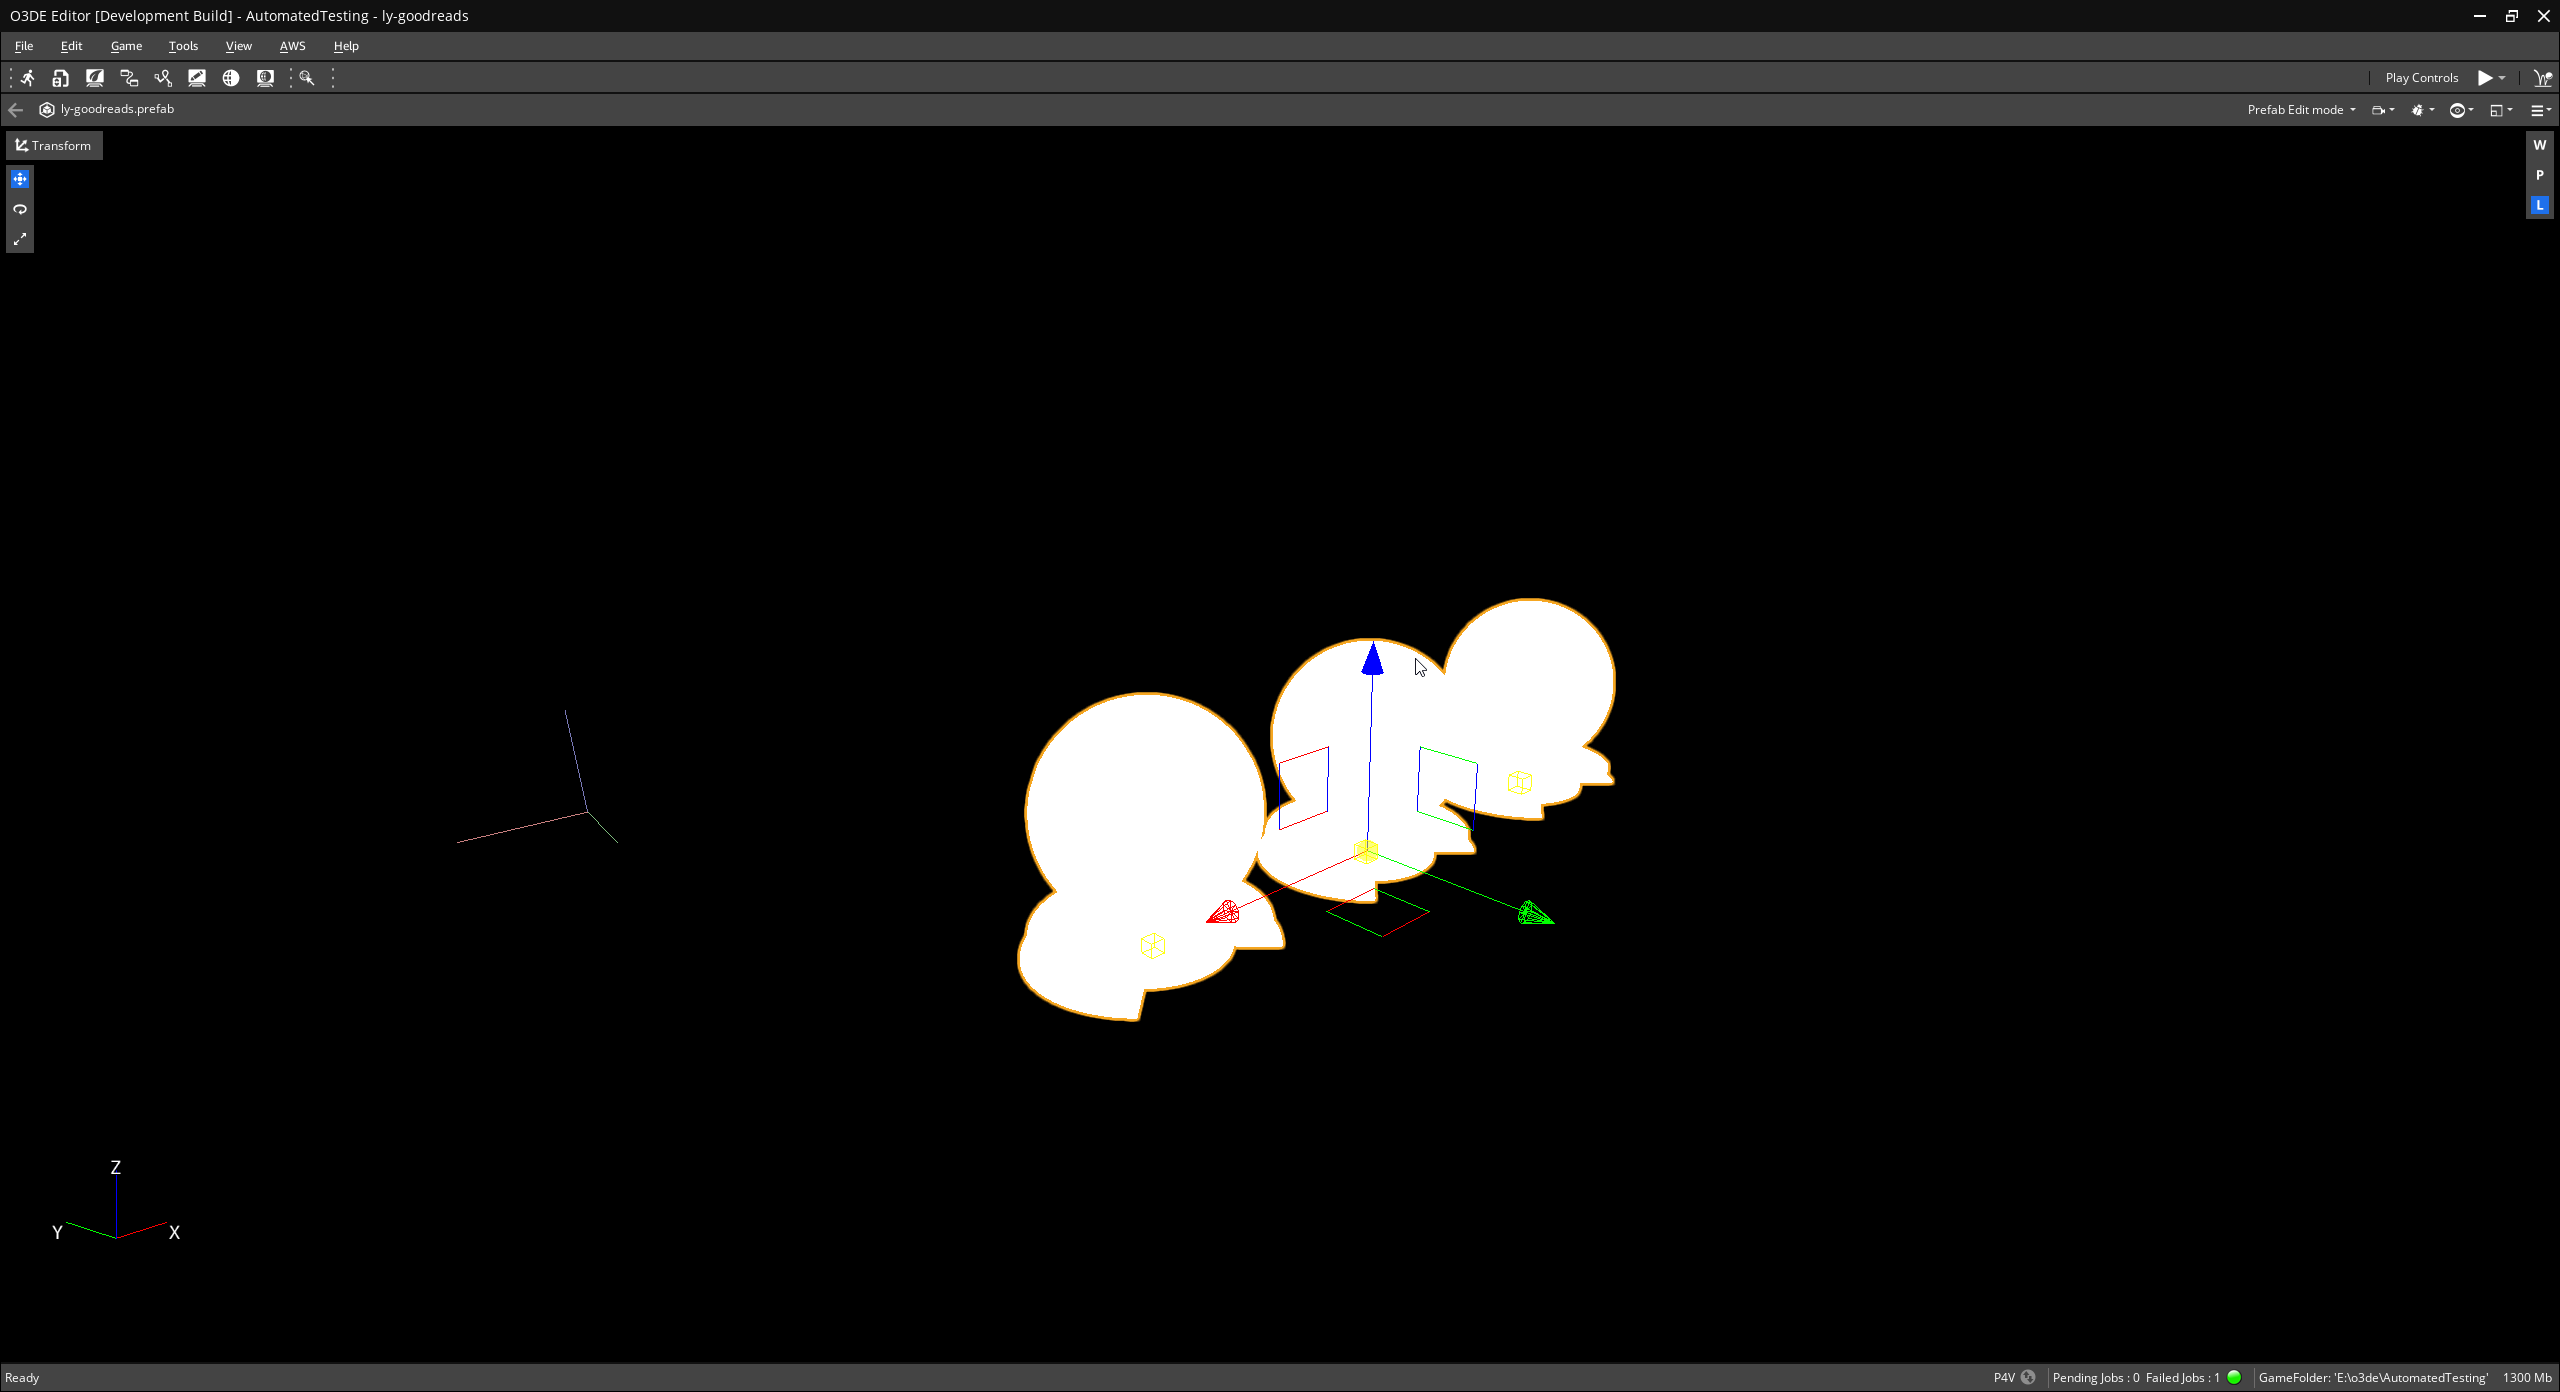
The result of adding this state is to apply the tint effect pass to everything in the viewport. This state is always on but in further steps we will implement the logic to be more selective with what we shade:
Step 2: Adding multiple effect passes
Editor states are not limited to single effect passes as multiple effect passes may be chained together to create more complex effects. To do this, we need to write a utility function to create the PassNameList to be passed into the EditorStateBase constructor and add an extra existing effect pass, the desaturation effect:
ExampleEditorState.cpp
static PassNameList CreateChildPasses()
{
    // Effect chain for our example editor state.
    return PassNameList
    {   // Black and white effect
        AZ::Name("EditorModeDesaturationTemplate"),
        // Darkening effect
        AZ::Name("EditorModeTintTemplate")
    };
}

ExampleEditorState::ExampleEditorState()
    : EditorStateBase(
        EditorState::FocusMode,
        "EditorStateTutorial",
        CreateChildPasses())
{
}
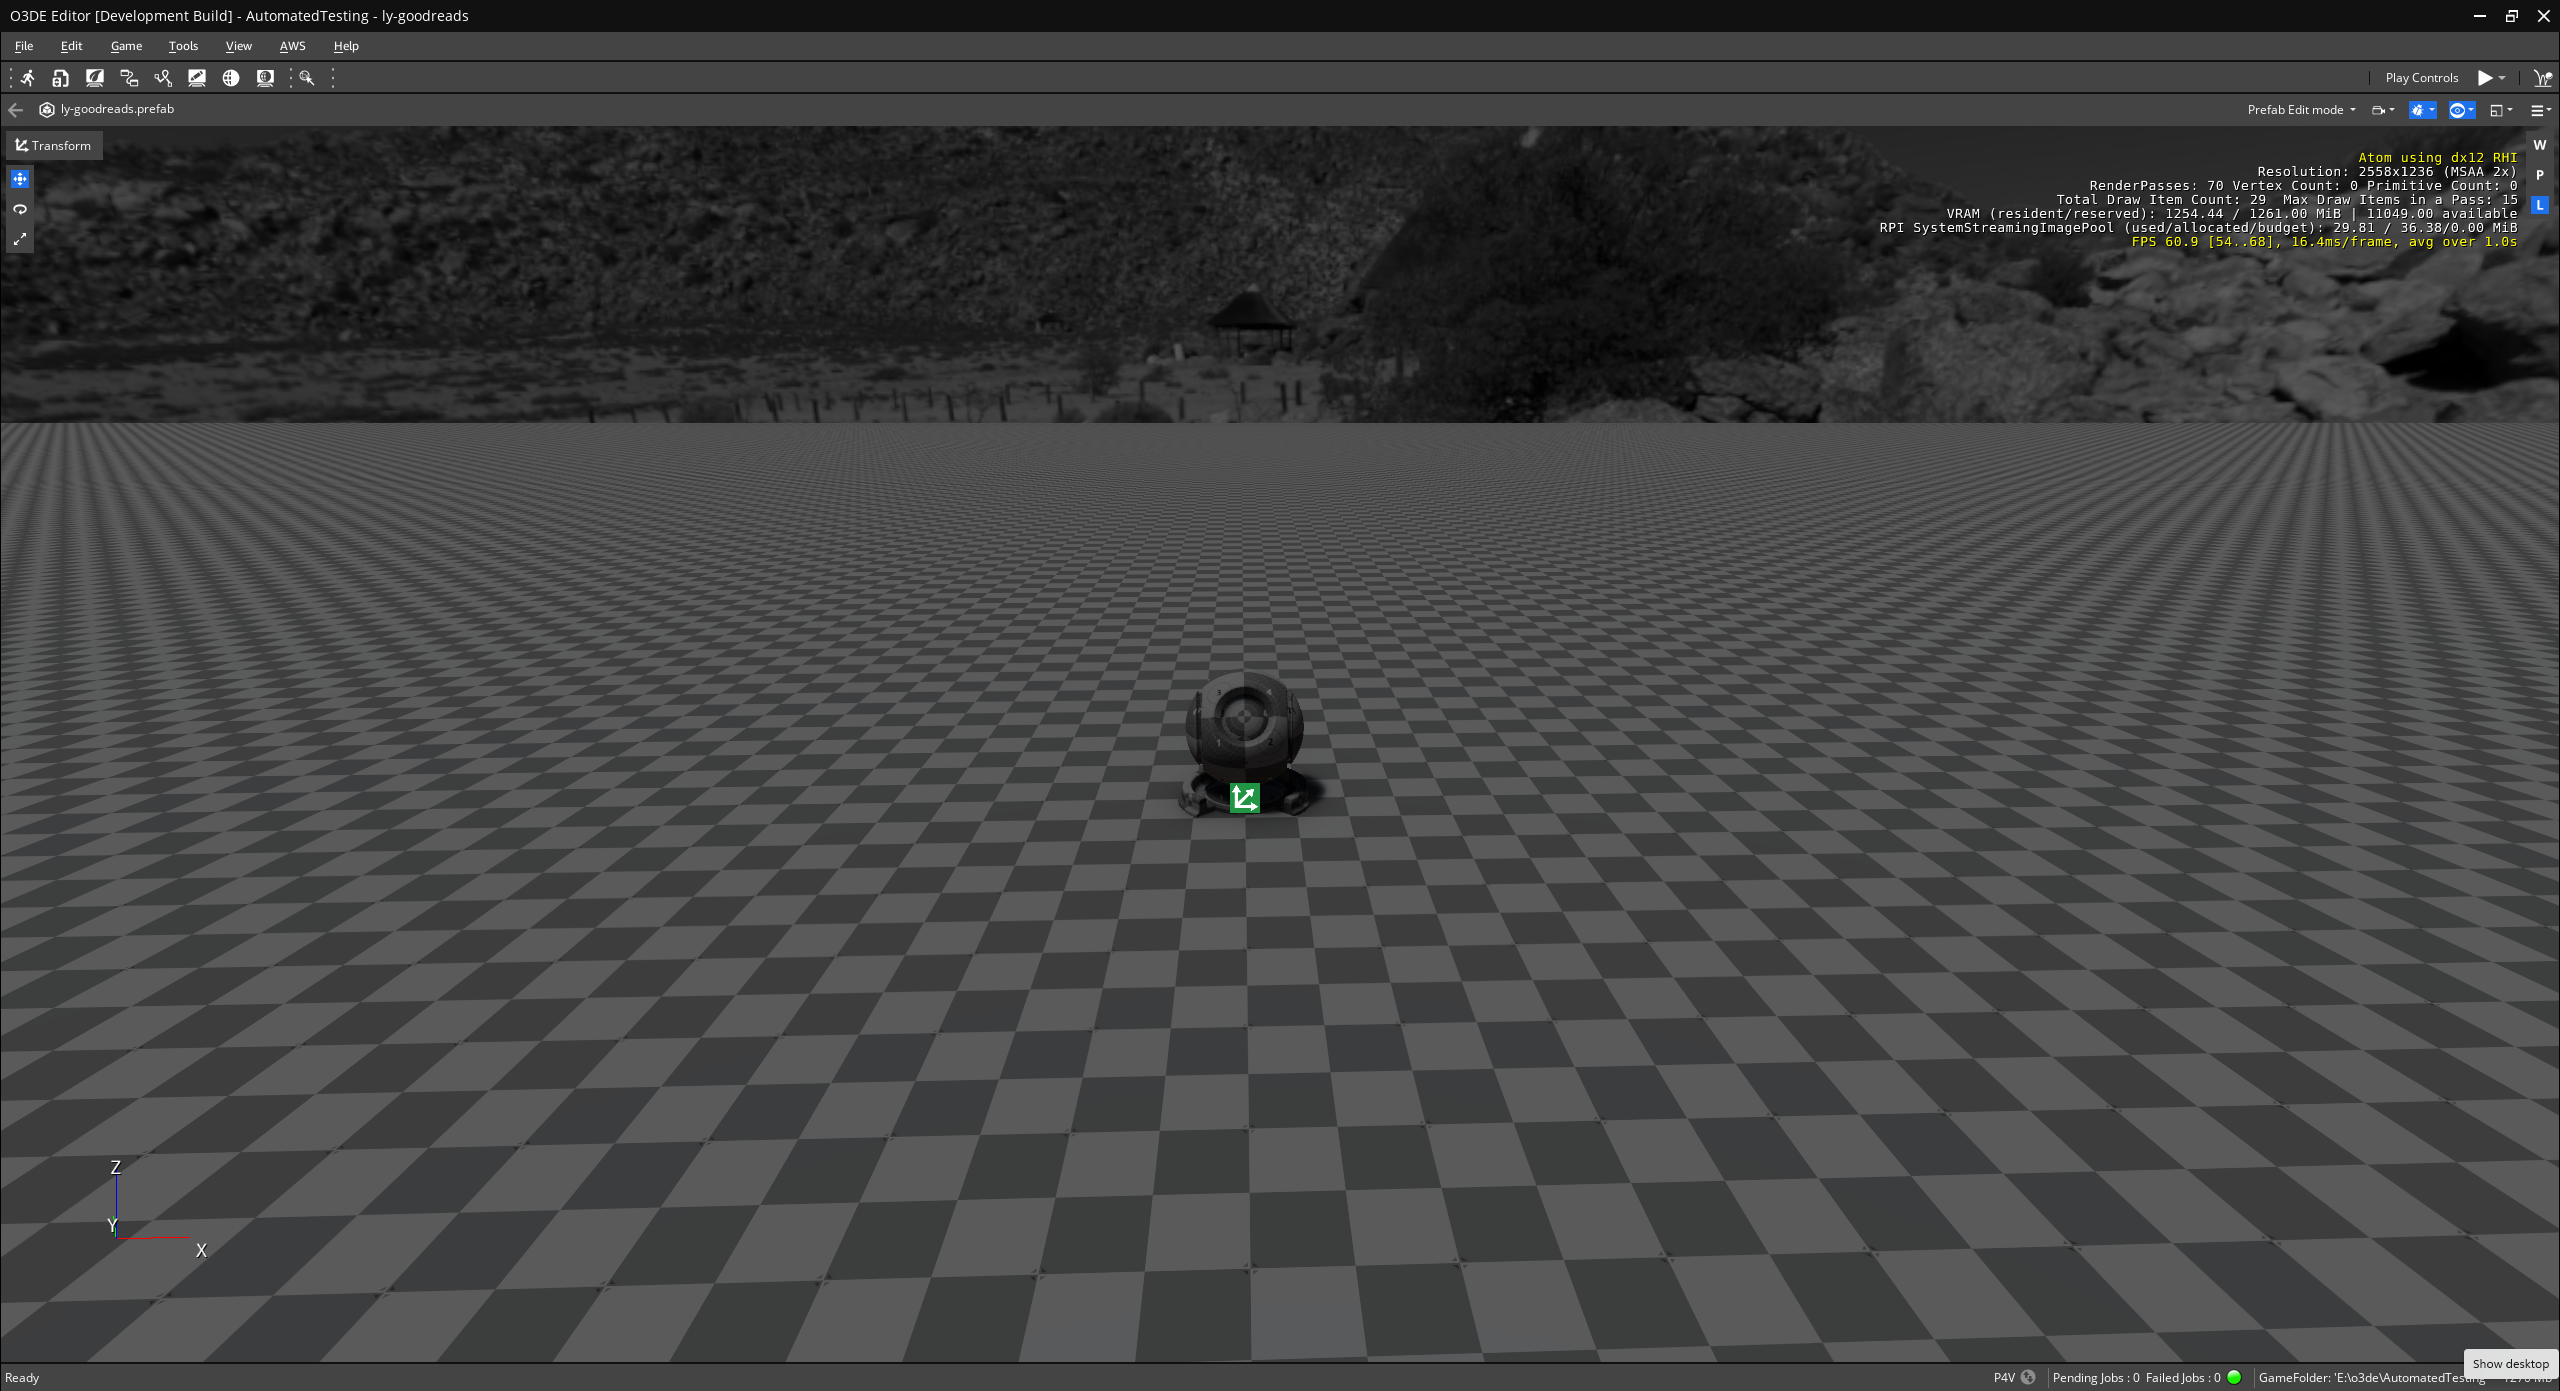
The result isn’t so different from the previous output but we can see that the skybox has been desaturated in comparison:
Step 3: Adding a custom effect pass
Adding existing effect passes to our state is easy enough but adding custom effect passes requires a little bit of boilerplate code. We will start off by adding a custom effect pass with a custom shader that writes out the color red to the entire viewport. First, we add our custom AZSL shader file:
ExampleEffect.azsl
#include <EditorModeCommon.azsli>
#include <EditorModeDepthTransition.azsli>

PSOutput MainPS(VSOutput IN)
{
    PSOutput OUT;
    OUT.m_color.rgb = float3(1.0, 0.0, 0.0);
    return OUT;
}
Next, we add the shader asset file :
ExampleEffect.shader
{
    "Source" : "ExampleEffect.azsl",

    "DepthStencilState" : {
        "Depth" : { "Enable" : false }
    },

    "ProgramSettings":
    {
      "EntryPoints":
      [
        {
          "name": "MainVS",
          "type": "Vertex"
        },
        {
          "name": "MainPS",
          "type": "Fragment"
        }
      ]
   }
}
Now we need to add our
pass file for this effect pass. This is 99% boilerplate code that can be copied from an existing editor state effect pass, we just need to change the Name and PassName accordingly as well as change the FilePath to the shader used by this pass:
ExampleEffect.pass
{
    "Type": "JsonSerialization",
    "Version": 1,
    "ClassName": "PassAsset",
    "ClassData": {
        "PassTemplate": {
            "Name": "ExampleEffectTemplate", // The name of our template
            "PassClass": "FullScreenTriangle", // The pass class to use
            "Slots": [
                {
                    "Name": "InputDepth",
                    "SlotType": "Input",
                    "ShaderInputName": "m_depth",
                    "ScopeAttachmentUsage": "Shader"
                },
                {
                    "Name": "InputEntityMask",
                    "SlotType": "Input",
                    "ShaderInputName": "m_entityMask",
                    "ScopeAttachmentUsage": "Shader",
                    "ShaderImageDimensionsConstant": "m_maskDimensions"
                },
                {
                    "Name": "InputColor",
                    "SlotType": "Input",
                    "ShaderInputName": "m_framebuffer",
                    "ScopeAttachmentUsage": "Shader"
                },
                {
                    "Name": "OutputColor",
                    "SlotType": "Output",
                    "ScopeAttachmentUsage": "RenderTarget",
                    "LoadStoreAction": {
                        "LoadAction": "DontCare"
                    }
                }
            ],
            "ImageAttachments": [
                {
                    "Name": "OutputAttachment",
                    "SizeSource": {
                        "Source": {
                            "Pass": "This",
                            "Attachment": "InputColor"
                        }
                    },
                    "FormatSource": {
                        "Pass": "This",
                        "Attachment": "InputColor"
                    }
                }
            ],
            "Connections": [
                {
                    "LocalSlot": "OutputColor",
                    "AttachmentRef": {
                        "Pass": "This",
                        "Attachment": "OutputAttachment"
                    }
                }
            ],
            "FallbackConnections": [
                {
                    "Input" : "InputColor",
                    "Output" : "OutputColor"
                }
            ],
            "PassData": {
                "$type": "FullscreenTrianglePassData",
                "ShaderAsset": {
                    "FilePath": "Shaders/ExampleEffect.shader" // Our shader
                },
                "PipelineViewTag": "MainCamera"
            }
        }
    }
}
Next, we need to update the pass registry with our newly-created effect pass:
EditorModeFeedback_ChildPassTemplates.azasset
{
    "Type": "JsonSerialization",
    "Version": 1,
    "ClassName": "AssetAliasesSourceData",
    "ClassData": {
        "AssetPaths": [
            // Existing pass templates removed for clarity
            {
                "Name": "ExampleEffectTemplate",
                "Path": "Passes/Child/ExampleEffect.pass"
            }
        ]
    }
}
Now all we need to do is update our editor state class to use our newly-added effect pass:
ExampleEditorState.cpp
ExampleEditorState::ExampleEditorState()
    : EditorStateBase(
        EditorState::FocusMode,
        "EditorStateTutorial",
        PassNameList{ AZ::Name("ExampleEffectTemplate") }) // Our newly-created pass
{
}
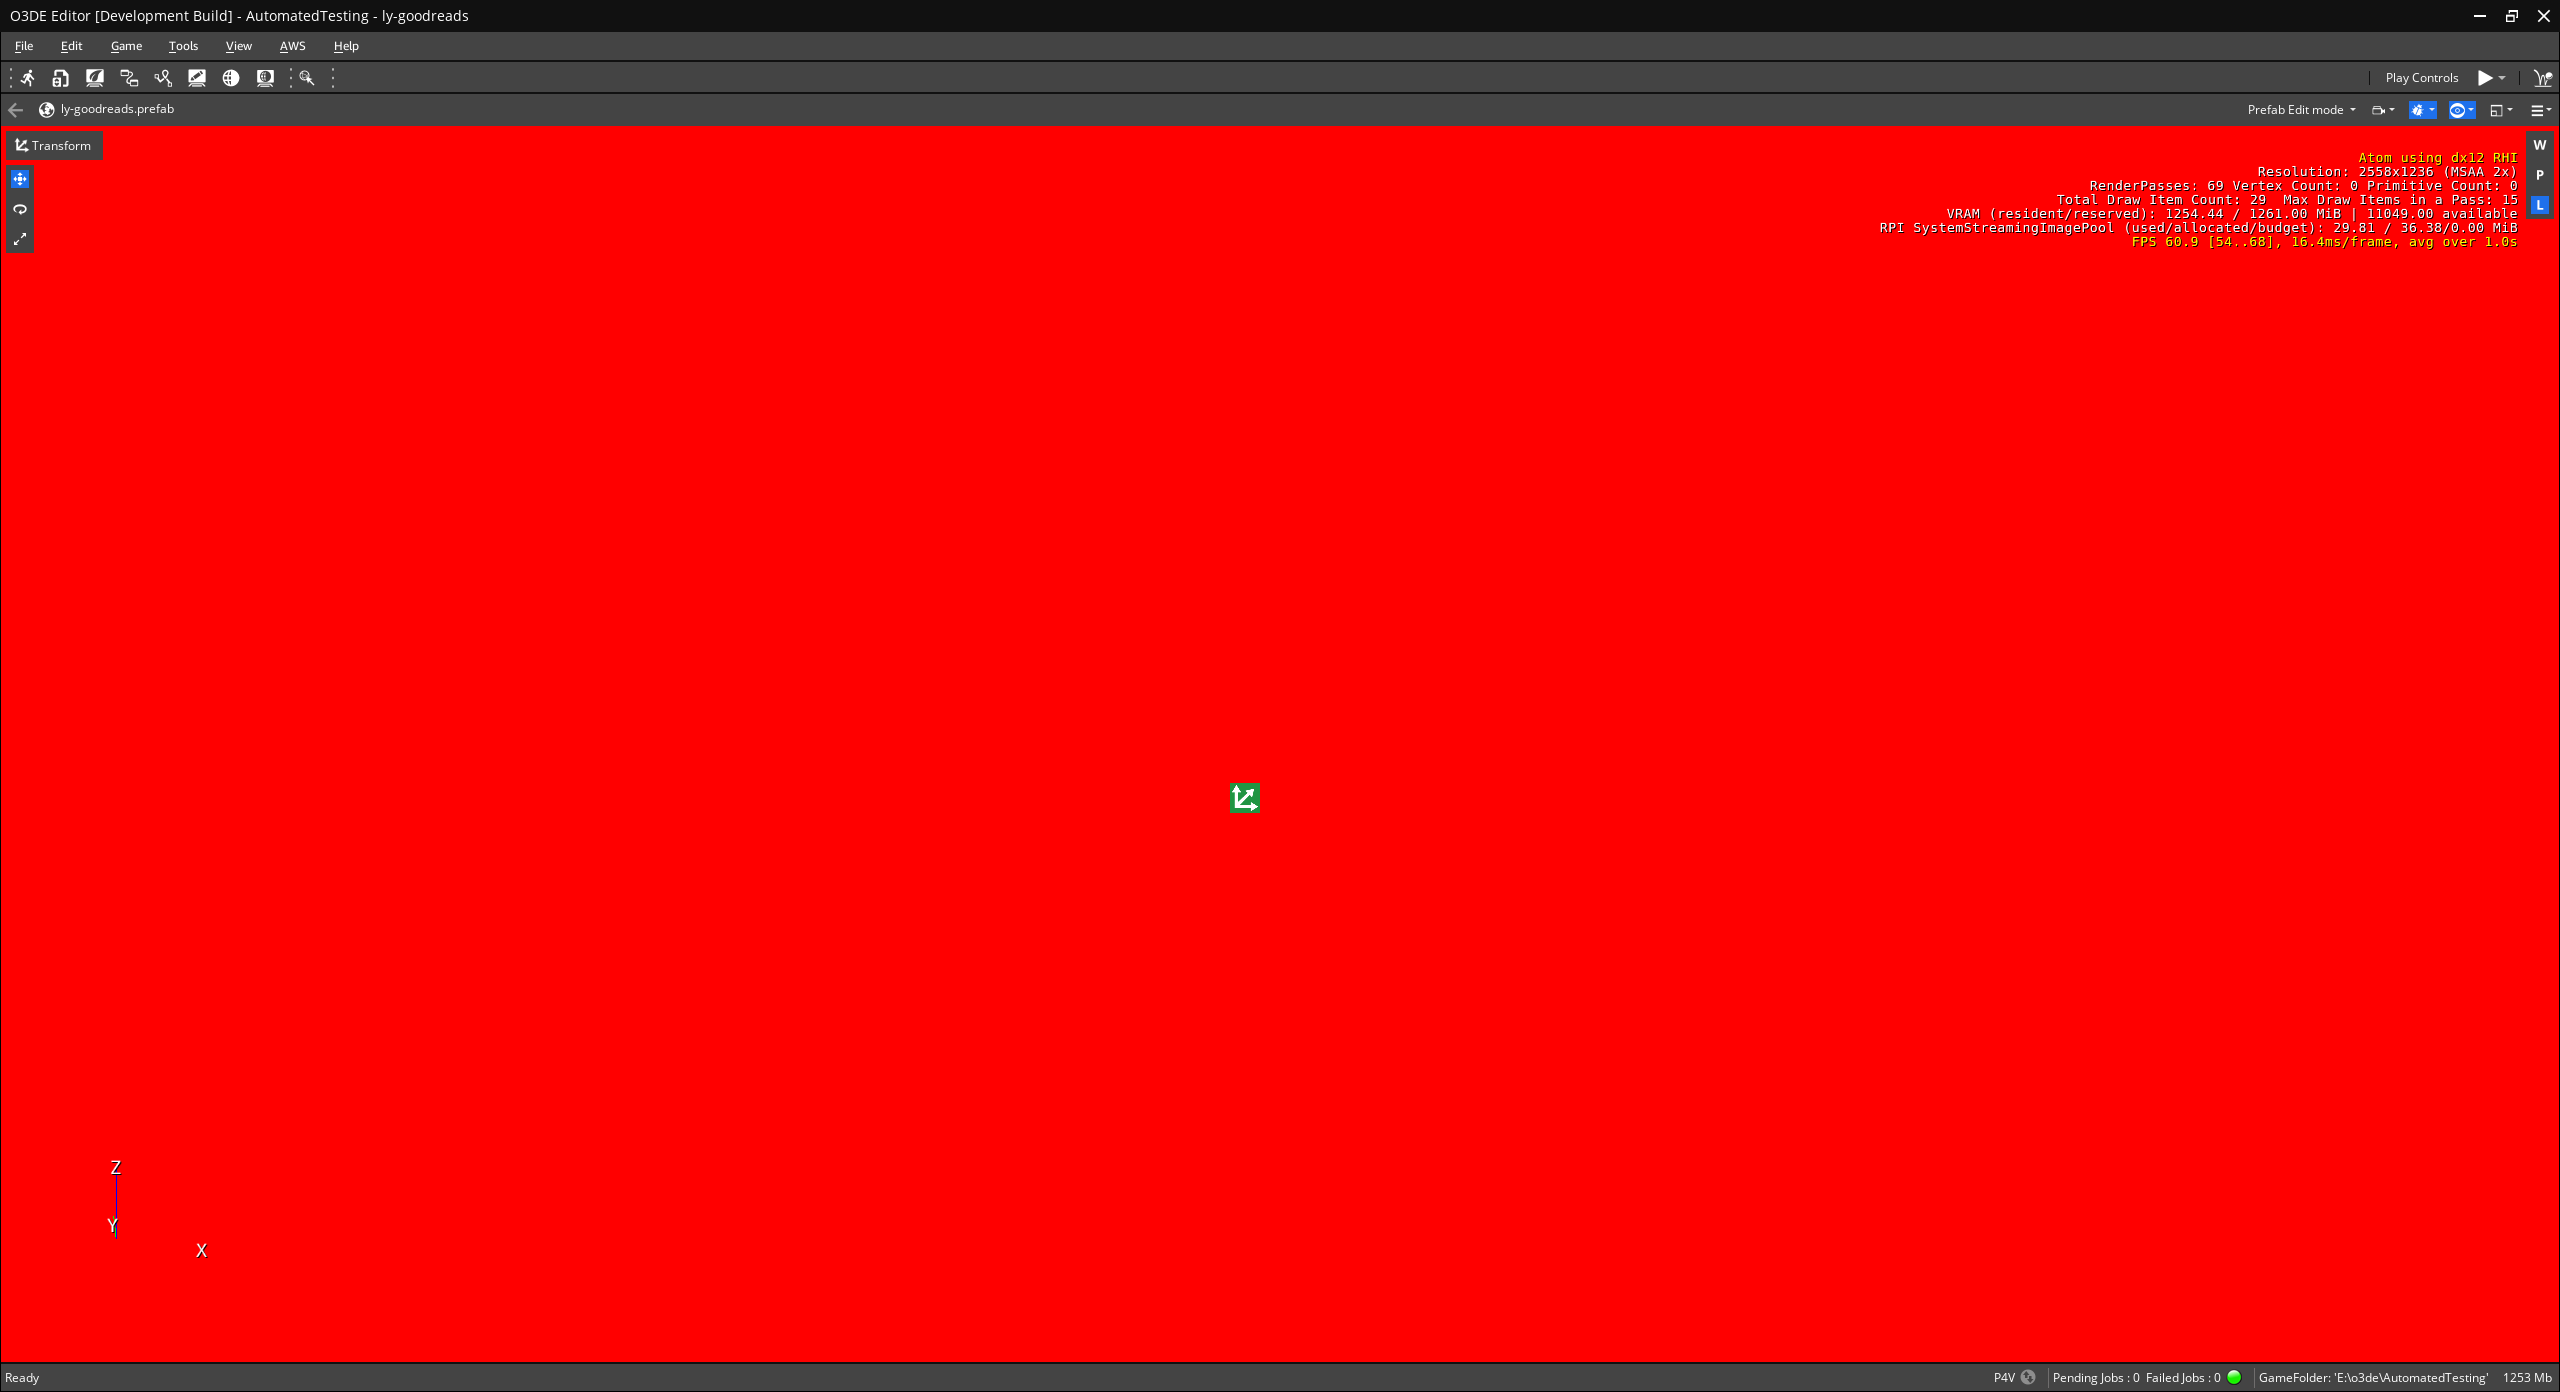
We now have the foundation to implement any manner of cool and interesting effects for this editor state:
Step 4: Exploring the Editor Mode Visual Feedback shader toolkit
The Editor Mode Visual Feedback system has a toolkit to perform the heavy lifting for functionality useful for writing custom effects. Each feedback effect shader has access to:
- The existing framebuffer
- The logarithmic depth buffer
- The entity mask
- The mask/framebuffer dimensions
- The final blend ratio to be applied to the effect
- The depth transition field for transitioning the effect over distance
In addition to these resources, there is a library to help with:
- Converting the logarithmic depth values into linear values
- Calculating the final blend amounts based on distance, mask values etc.
We won’t have space to explore all of the tools in the toolkit (but feel free to check out the existing effect passes to see how they’re used) so instead in this step we’ll explore how to expand the toolkit and the existing depth resources. Let’s see how we can reconstruct the normals in view space. This code is based on the ComputeWorldNormalAndPosition function in
FullScreenShadow.azsl . Add the following code to the bottom
EditorModeCommon.azsli so it will be accessible to all shaders used by the Editor Mode Visual Feedback system:
EditorModeCommon.azsl
//! Calculates the view position and normal from the fragment position.
void ComputeViewNormalAndPosition(VSOutput IN, out float3 outPositionWS, out float3 outNormalWS)
{
    const float2 pixelSize = PassSrg::m_maskDimensions.zw;  // How big a pixel is in screen UV space
    const float2 halfPixel = pixelSize * 0.5f;
    const int2   screenPos = IN.m_position.xy;              // The coordinates of the screen pixel being shaded
    const float2 screenUV  = IN.m_texCoord.xy;              // The UV value [0, 1] of the screen pixel

    // Do 2 depth gather ops to get 5 depth values (cross centered on pixel being shaded). Reminder that gather is laid out like so:
    //  W Z
    //  X Y
    float4 depthUpLeft = PassSrg::m_depth.Gather(PassSrg::PointSampler, screenUV - halfPixel);
    float4 depthBottomRight = PassSrg::m_depth.Gather(PassSrg::PointSampler, screenUV + halfPixel);

    depthUpLeft = CalculateLinearDepth(depthUpLeft);
    depthBottomRight = CalculateLinearDepth(depthBottomRight);

    float3 positionVS = ViewSrg::GetViewSpacePosition(screenUV, depthUpLeft.y);

    float3 diffX;
    {
        float3 positionLeft  = ViewSrg::GetViewSpacePosition( float2(screenUV.x - pixelSize.x, screenUV.y), depthUpLeft.x);
        float3 positionRight = ViewSrg::GetViewSpacePosition( float2(screenUV.x + pixelSize.x, screenUV.y), depthBottomRight.z);
        float3 diffLeft = positionVS - positionLeft;
        float3 diffRight = positionRight - positionVS;
        diffX = (abs(diffLeft.z) < abs(diffRight.z)) ? diffLeft : diffRight;
    }
    float3 diffY;
    {
        float3 positionUp   = ViewSrg::GetViewSpacePosition( float2(screenUV.x, screenUV.y - pixelSize.y), depthUpLeft.z);
        float3 positionDown = ViewSrg::GetViewSpacePosition( float2(screenUV.x, screenUV.y + pixelSize.y), depthBottomRight.x);
        float3 diffUp = positionVS - positionUp;
        float3 diffDown = positionDown - positionVS;
        diffY = (abs(diffUp.z) < abs(diffDown.z)) ? diffUp : diffDown;
    }

    float3 normalVS = normalize( cross(diffX, diffY) );

    positionVS.z = -positionVS.z;
    normalVS.z = -normalVS.z;

    outPositionWS = positionVS;
    outNormalWS = normalVS;
}

//! Returns the world position from the view position.
float3 ComputeWorldPositionFromViewPosition(in float3 positionVS)
{
    return mul(ViewSrg::m_viewMatrixInverse, float4(positionVS, 1) ).xyz;
}

//! Returns the world normal from the view normal.
float3 ComputeWorldNormalFromViewNormal(in float3 normalVS)
{
    return mul(ViewSrg::m_viewMatrixInverse, float4(normalVS, 0) ).xyz;
}
All we need to do now is add the following lines to our shader:
ExampleEffect.azsl
#include <EditorModeCommon.azsli>
#include <EditorModeDepthTransition.azsli>

PSOutput MainPS(VSOutput IN)
{
    PSOutput OUT;
    float3 positionVS;
    float3 normalVS;
    ComputeViewNormalAndPosition(IN, positionVS, normalVS);
    OUT.m_color.rgb = normalVS;
    return OUT;
}
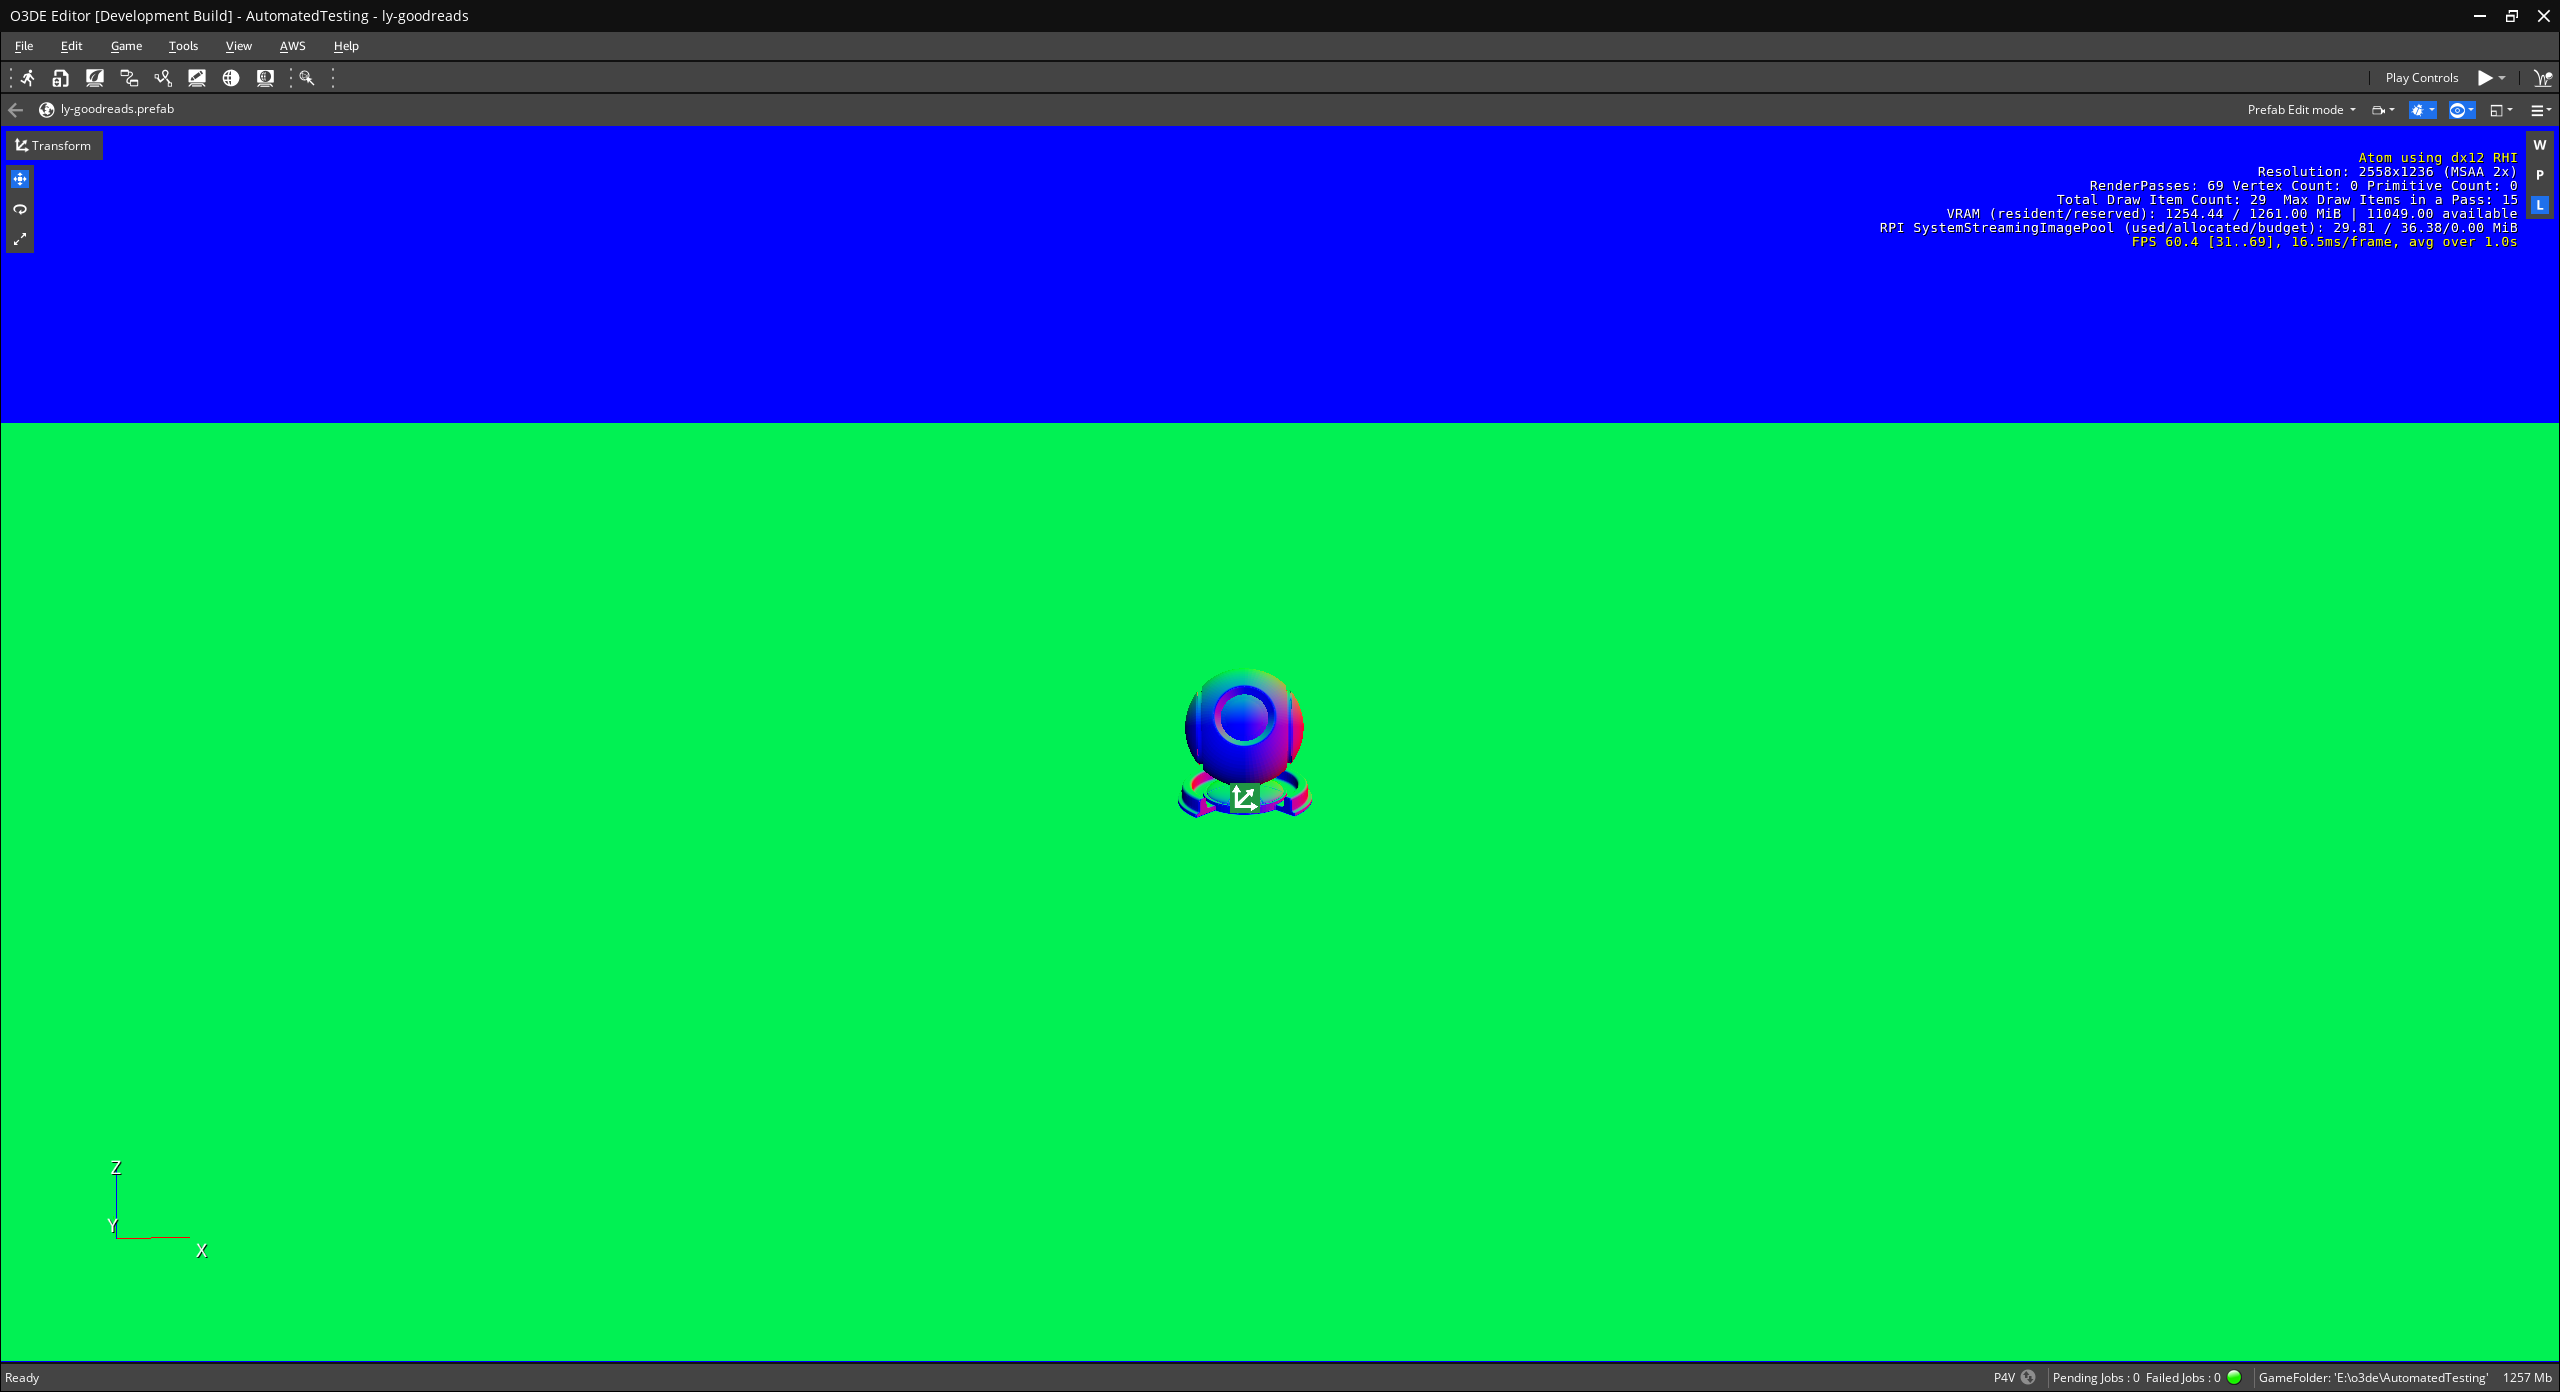
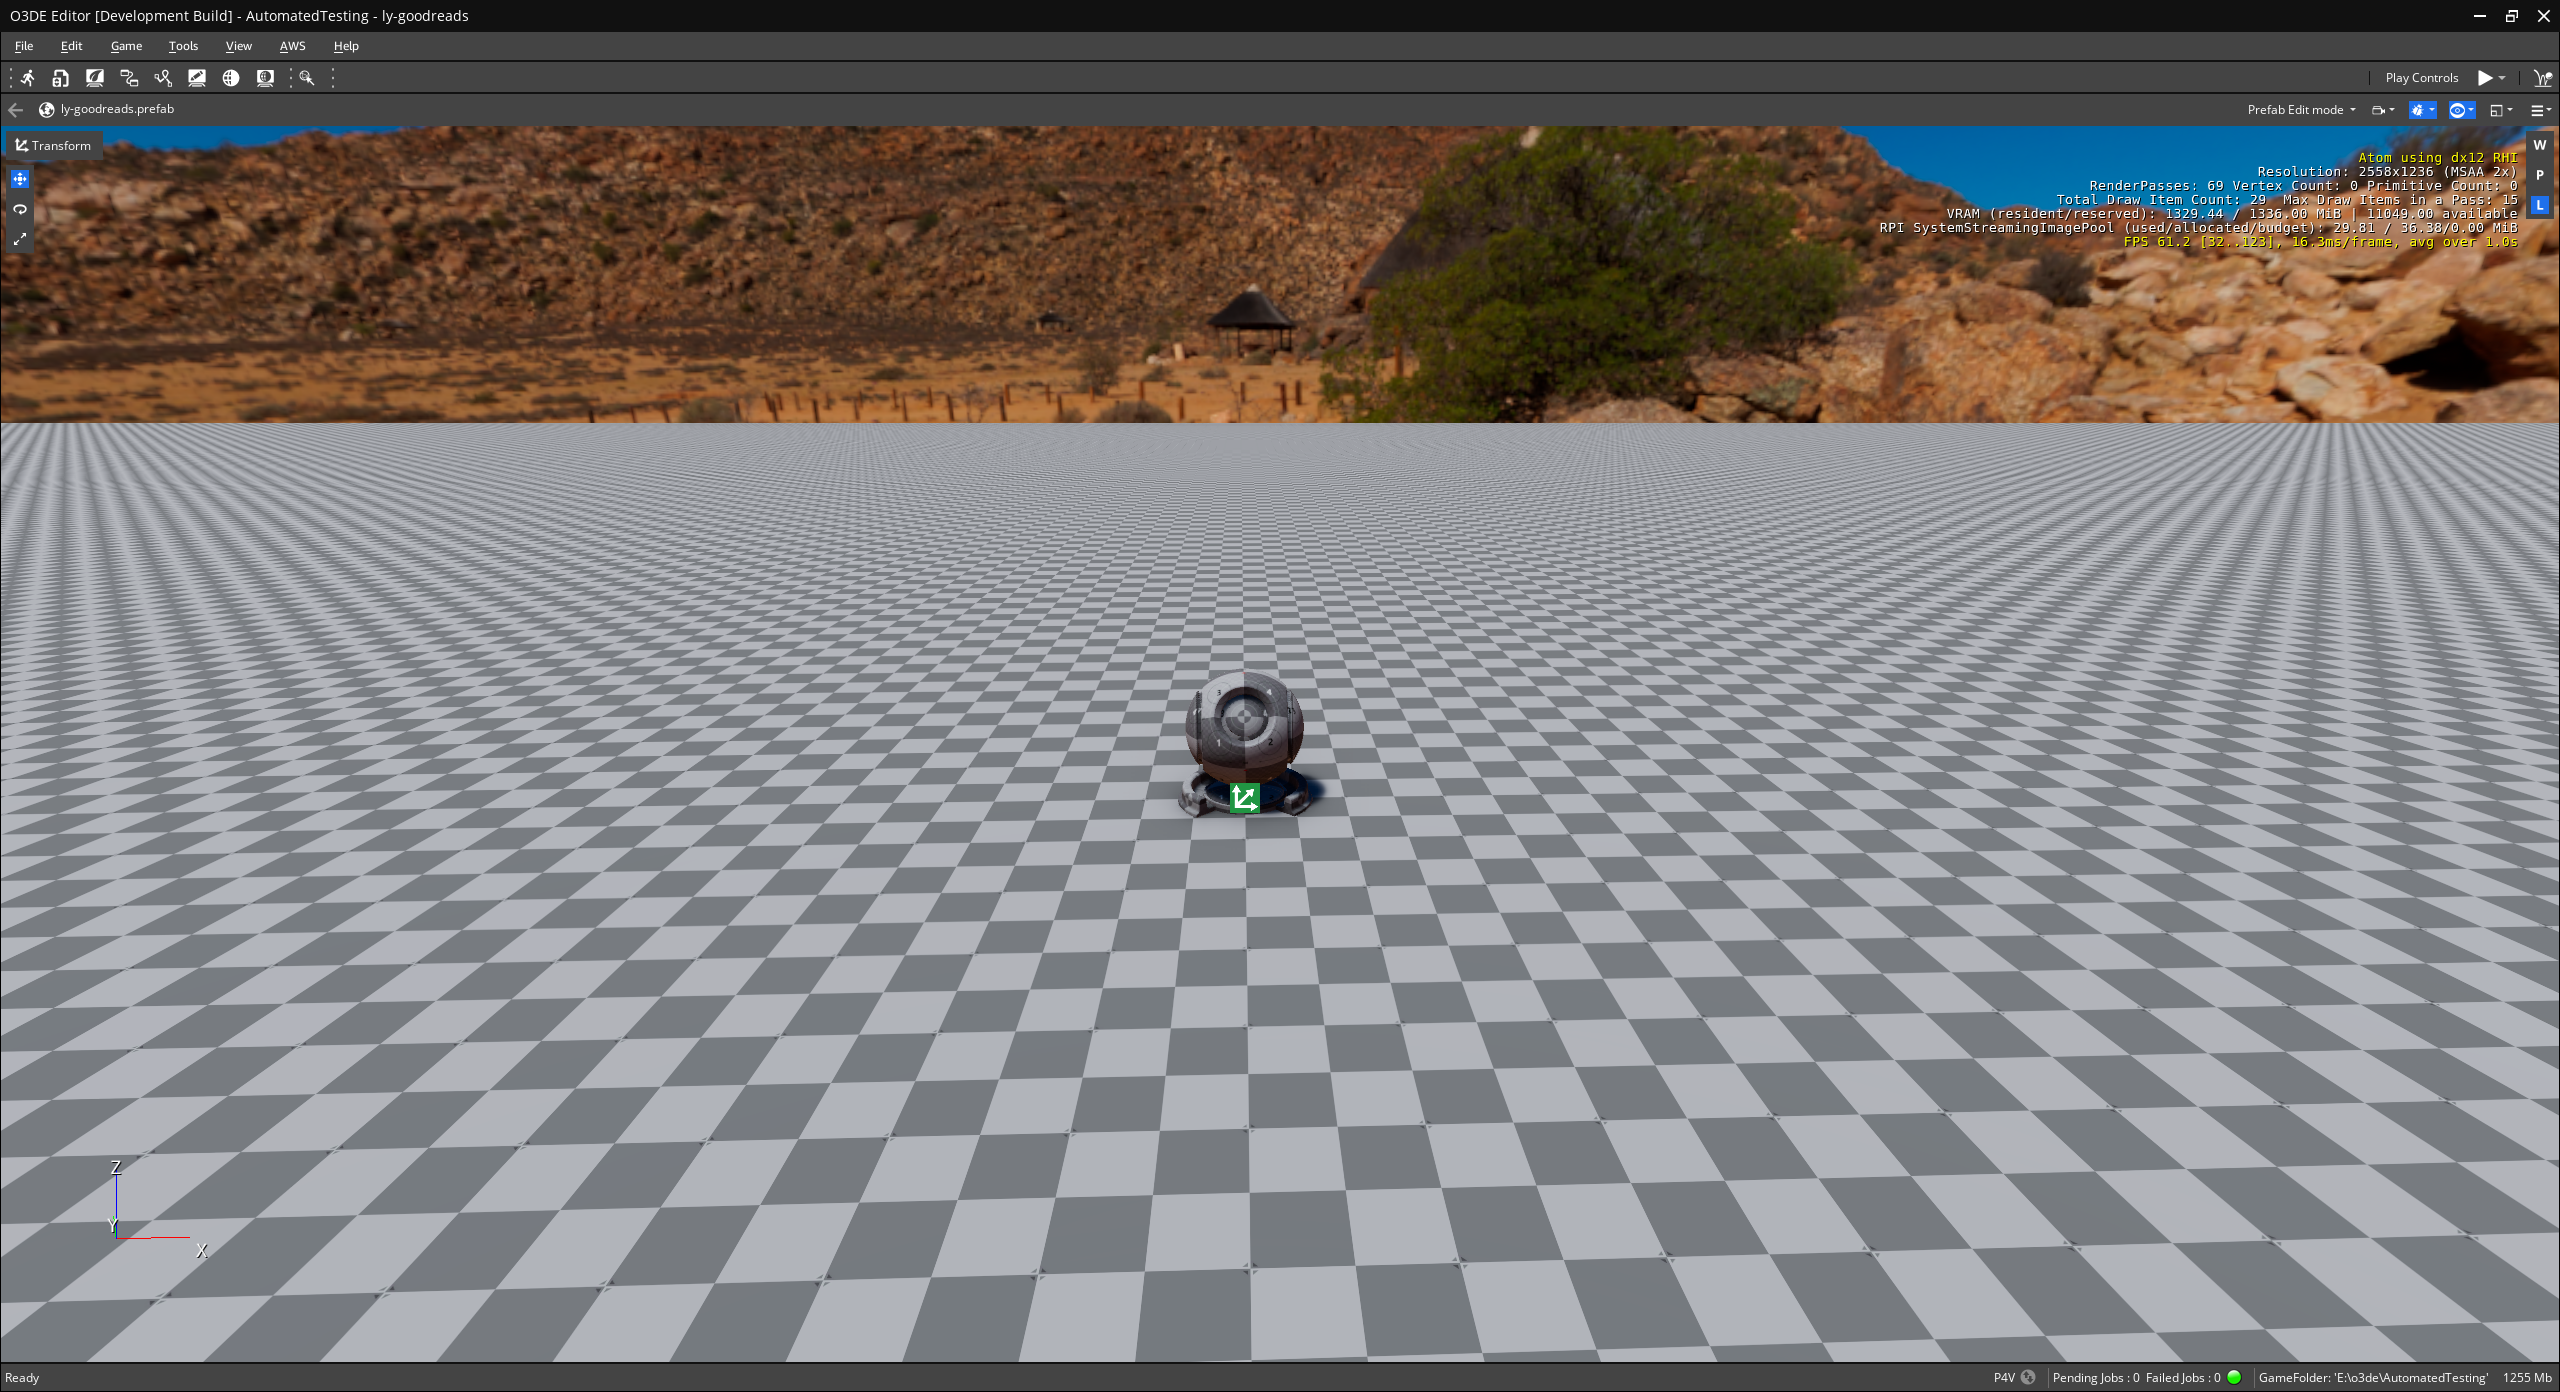
The result of these changes is the viewport is filled with the reconstructed normals in view space for each fragment:
To transform the normals into world space, we modify the shader as follows:
ExampleEffect.azsl
#include <EditorModeCommon.azsli>
#include <EditorModeDepthTransition.azsli>

PSOutput MainPS(VSOutput IN)
{
    PSOutput OUT;
    float3 positionVS;
    float3 normalVS;
    ComputeViewNormalAndPosition(IN, positionVS, normalVS);
    float3 normalWS = ComputeWorldNormalFromViewNormal(normalVS);
    OUT.m_color.rgb = normalWS;
    return OUT;
}
The result of these changes is the viewport is filled with the reconstructed normals in world space for each fragment:
Now let’s take a look at the logarithmic depth buffer we have available to us. We can sample the logarithmic depth buffer using the texture coordinates provided to the pixel shader and display them as follows:
ExampleEffect.azsl
#include <EditorModeCommon.azsli>
#include <EditorModeDepthTransition.azsli>

PSOutput MainPS(VSOutput IN)
{
    PSOutput OUT;
    const float logDepth =
        PassSrg::m_depth.Sample(PassSrg::PointSampler, IN.m_texCoord).r;
    OUT.m_color.rgb = float3(logDepth, logDepth, logDepth);
    return OUT;
}
It’s very difficult to see logarithmic depth values unless you’re up close to geometry so we will use the Atom pass viewer to view the output of our pass and clamp the color range into an easily visible range:
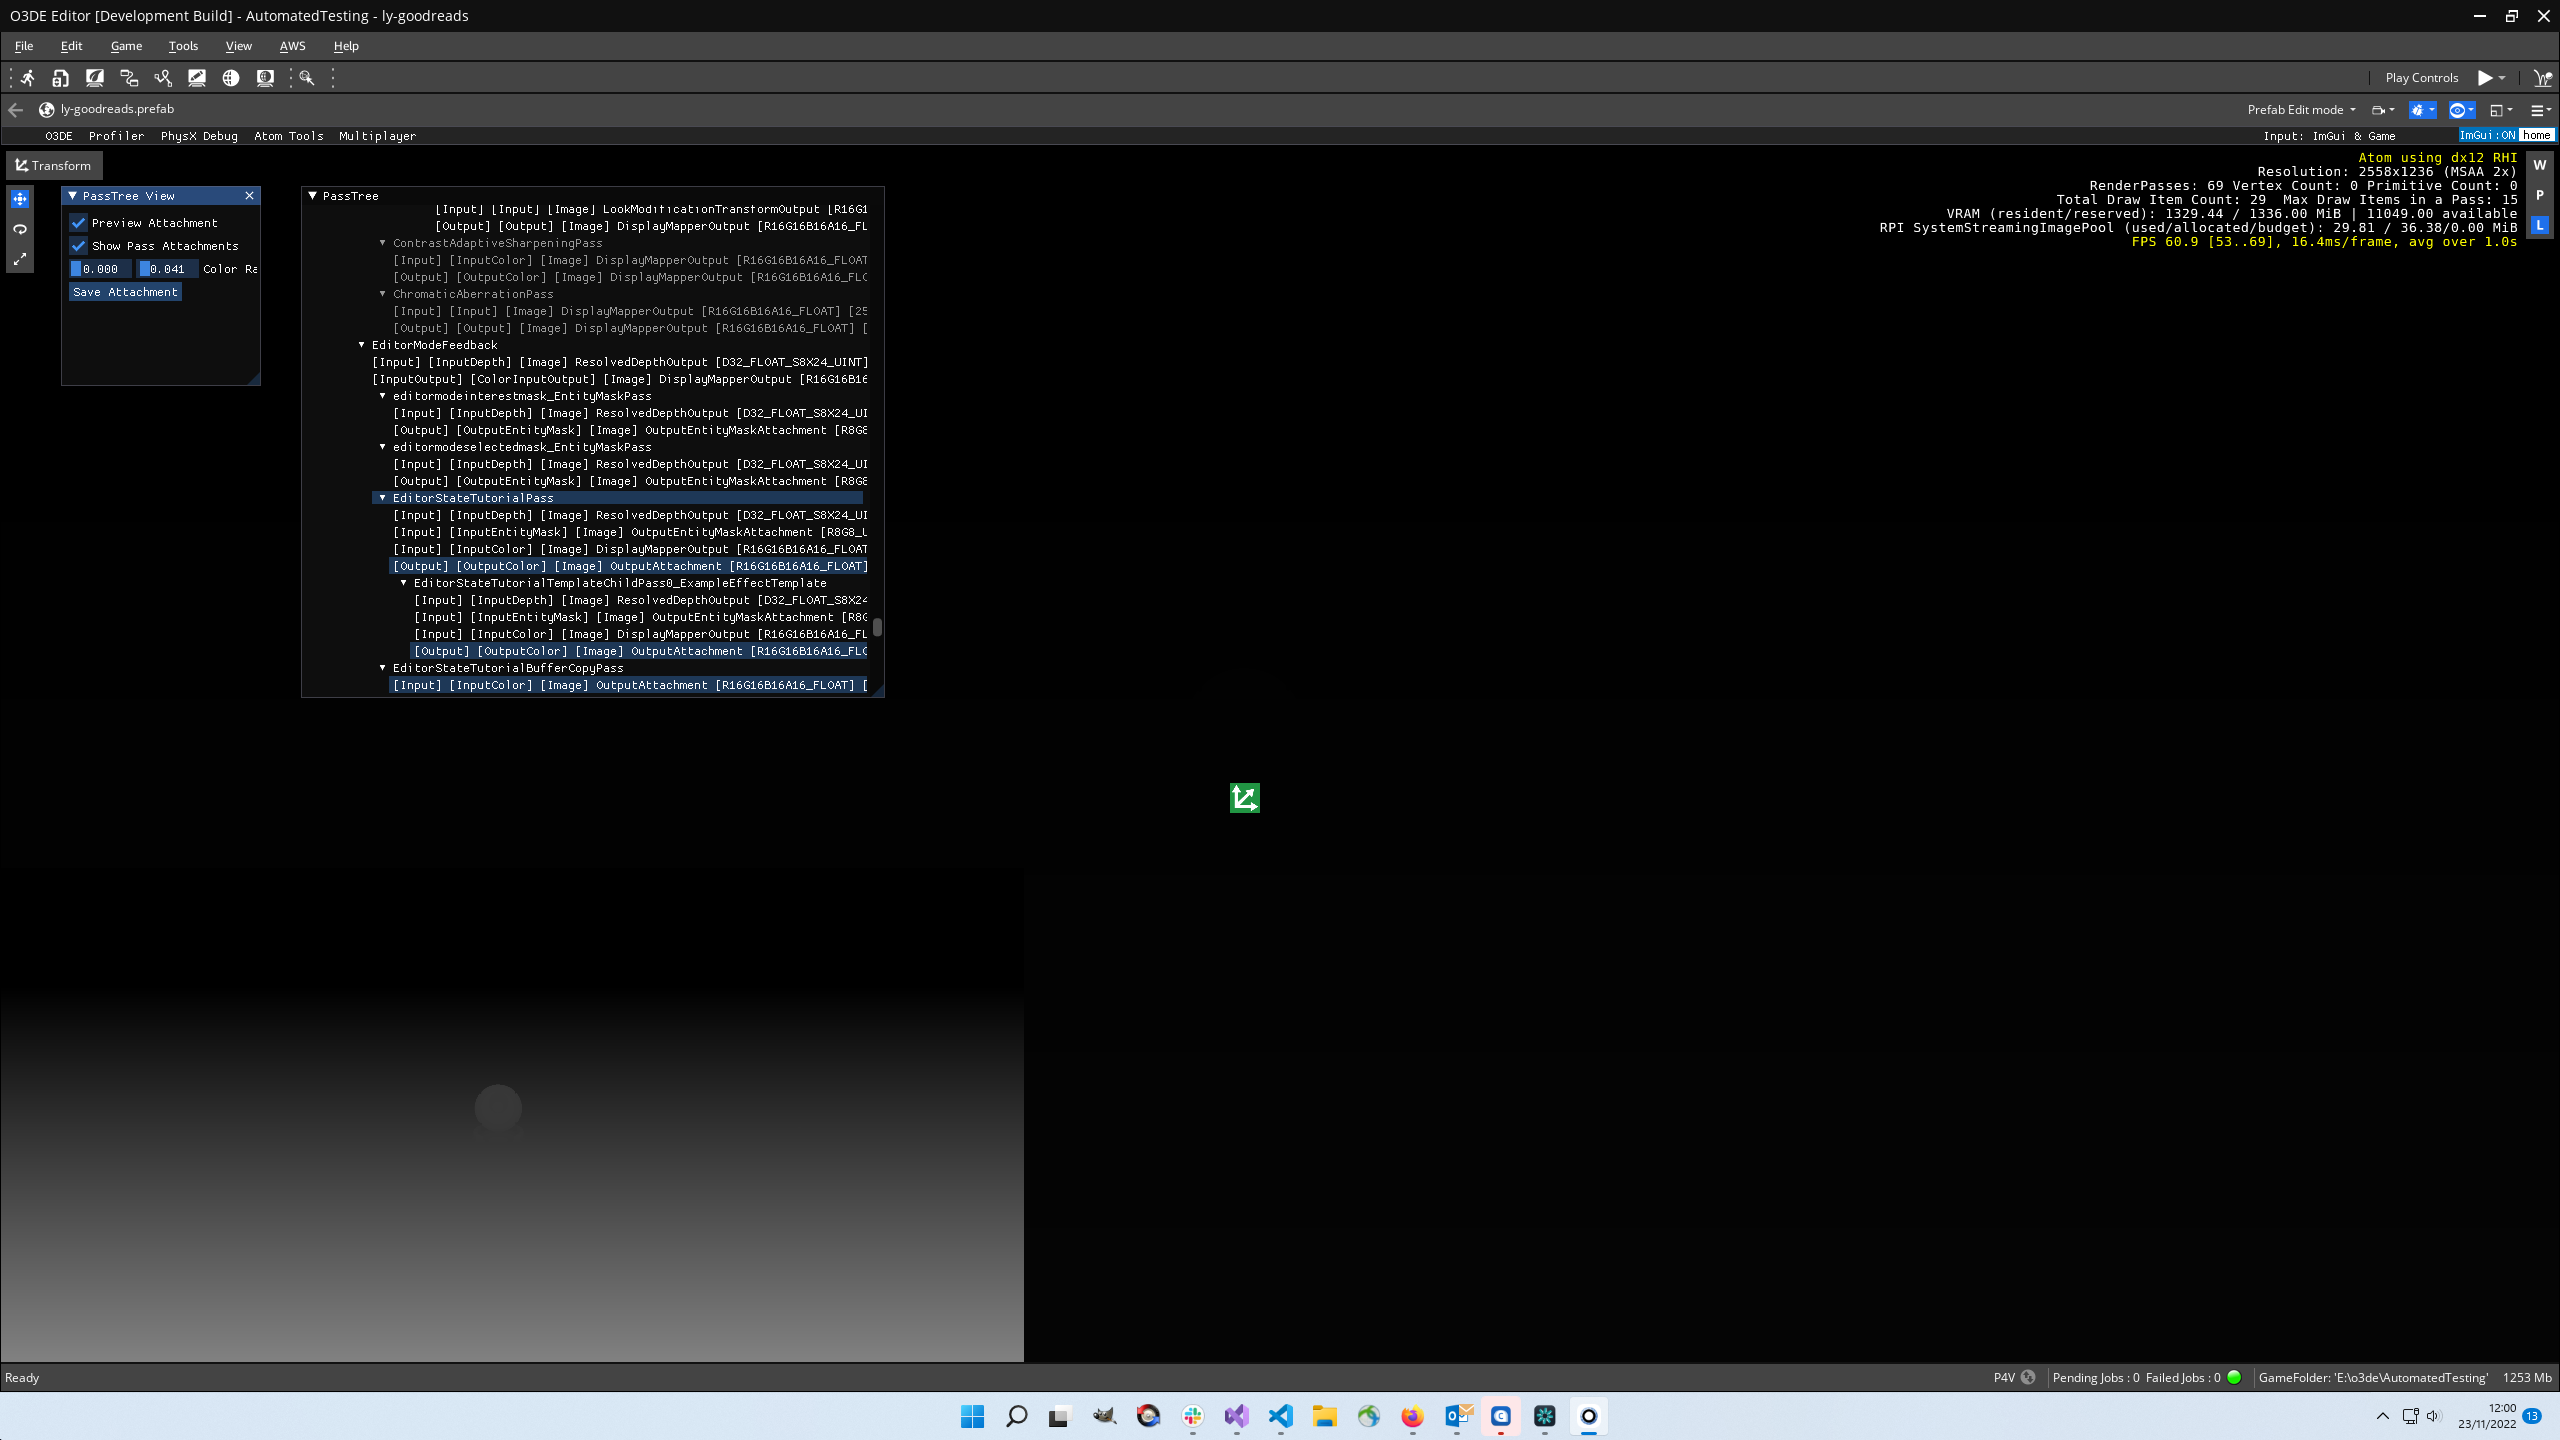
We will skip the linear depth as there’s visually not much else going on compared to the logarithmic depth and we’ll also skip the entity mask as we’ve yet to implement any logic to send entities of interest to the mask so instead we’ll take a look at how we can sample the existing framebuffer:
ExampleEffect.azsl
#include <EditorModeCommon.azsli>
#include <EditorModeDepthTransition.azsli>

PSOutput MainPS(VSOutput IN)
{
    PSOutput OUT;
    const float3 inColor = PassSrg::m_framebuffer.Sample(PassSrg::LinearSampler, IN.m_texCoord).rgb;
    OUT.m_color.rgb = inColor;
    return OUT;
}
The output of sampling the input framebuffer in a given effect shader is to display the output of the previous editor state stage. As ours is the first stage in the list, the output is simply the viewport as it would be rendered normally without any editor state feedback effects:
Step 5: Doing something useful
So far, the effects we’ve implemented have been uninteresting from a feedback point of view and impractical as we’ve been applying them to everything in the viewport. For this step, we we add logic to have this effect send the entity selection to the mask (a more refined approach would be to implement the necessary logic in the class’s inherited IsEnabled member function to only have the effect on when there is an entity selection, but we will leave that as an exercise for the reader). For the effect itself, we will implement a distance-based
Bokeh blur .
First up, let’s implement the logic to send the selected entities to the mask:
ExampleEditorState.cpp
#include <AzToolsFramework/Entity/EditorEntityHelpers.h>
#include <AzToolsFramework/Viewport/ViewportMessages.h>
#include <AzToolsFramework/Entity/EditorEntityInfoBus.h>

AzToolsFramework::EntityIdList ExampleEditorState::GetMaskedEntities() const
{
    AzToolsFramework::EntityIdList initialSelectedEntityList, selectedEntityList;
    AzToolsFramework::ToolsApplicationRequestBus::BroadcastResult(
        initialSelectedEntityList,
        &AzToolsFramework::ToolsApplicationRequests::GetSelectedEntities);

    // Drill down any entity hierarchies to select all children of the currently
    // selected entities
    for (const auto& selectedEntityId : initialSelectedEntityList)
    {
        AZStd::queue<AZ::EntityId> entityIdQueue;
        entityIdQueue.push(selectedEntityId);

        while (!entityIdQueue.empty())
        {
            AZ::EntityId entityId = entityIdQueue.front();
            entityIdQueue.pop();

            if (entityId.IsValid())
            {
                selectedEntityList.push_back(entityId);
            }

            AzToolsFramework::EntityIdList children;
            AzToolsFramework::EditorEntityInfoRequestBus::EventResult(
                children,
                entityId,
                &AzToolsFramework::EditorEntityInfoRequestBus::Events::GetChildren);

            for (AZ::EntityId childEntityId : children)
            {
                entityIdQueue.push(childEntityId);
            }
        }
    }

    return selectedEntityList;
}
Now let’s implement the Bokeh blur in our shader. We’re going to implement the distance-based blur manually instead of using the distance based blending in the toolkit as we have not implemented a custom class pass for our pass (feel free to look at how this is implemented with the existing editor state effects and implement it yourself):
ExampleEffect.azsl
#include <EditorModeCommon.azsli>
#include <EditorModeDepthTransition.azsli>

#define GOLDEN_ANGLE 2.3999632
#define ITERATIONS 150

float3 Bokeh(float2 uv, float radius)
{
    const float2x2 rotation = float2x2(
        cos(GOLDEN_ANGLE),
        sin(GOLDEN_ANGLE),
        -sin(GOLDEN_ANGLE),
        cos(GOLDEN_ANGLE));

    float3 accumulator = float3(0.0, 0.0, 0.0);
    float3 numSamples = accumulator;
    float radius = 1.0;
    float2 vangle = float2(0.0, radius * 0.01 / sqrt(float(ITERATIONS)));

    for (int j = 0; j < ITERATIONS; j++)
    {
        radius += 1.0 / radius ;
        vangle = mul(vangle, rotation);
        float3 col = PassSrg::m_framebuffer.Sample(
            PassSrg::LinearSampler, uv + (radius - 1.0) * vangle).xyz;
        col = col * col * 1.8;
        float3 bokeh = pow(col, float3(4.0, 4.0, 4.0));
        accumulator += col * bokeh;
        numSamples += bokeh;
    }

    return accumulator / numSamples;
}

PSOutput MainPS(VSOutput IN)
{
    PSOutput OUT;

    // Sample the entity mask for the entity selection
    const float2 mask = PassSrg::m_entityMask.Sample(
        PassSrg::PointSampler, IN.m_texCoord);

    // Manually implement the depth-based blend transition
    // (if implementing a pass class for this pass, inherit from
    // EditorModeFeedbackChildPassBase and all of this code can be
    // replaced with a call to CalculateBlendTransitionAmountFromDepth)
    float logdepth = PassSrg::m_depth.Sample(
        PassSrg::PointSampler, IN.m_texCoord).r;
    const float linearDepth = CalculateLinearDepth(logdepth);
    const float depthTransitionStart = 0.0;
    const float depthTransitionDuration = 20.0f;
    const float minDepthTransitionValue = 0.2;
    const float depthTransition = clamp(
        (linearDepth - depthTransitionStart) / (depthTransitionDuration),
        minDepthTransitionValue, 1.0);
    const float strength = clamp((1.0 - mask) * depthTransition, 0.0, 1.0);

    // Sample the Bokeh filter (selected entities will be left untouched)
    float3 outColor = Bokeh(IN.m_texCoord, strength * 0.75);

    OUT.m_color.rgb = outColor;
    return OUT;
}
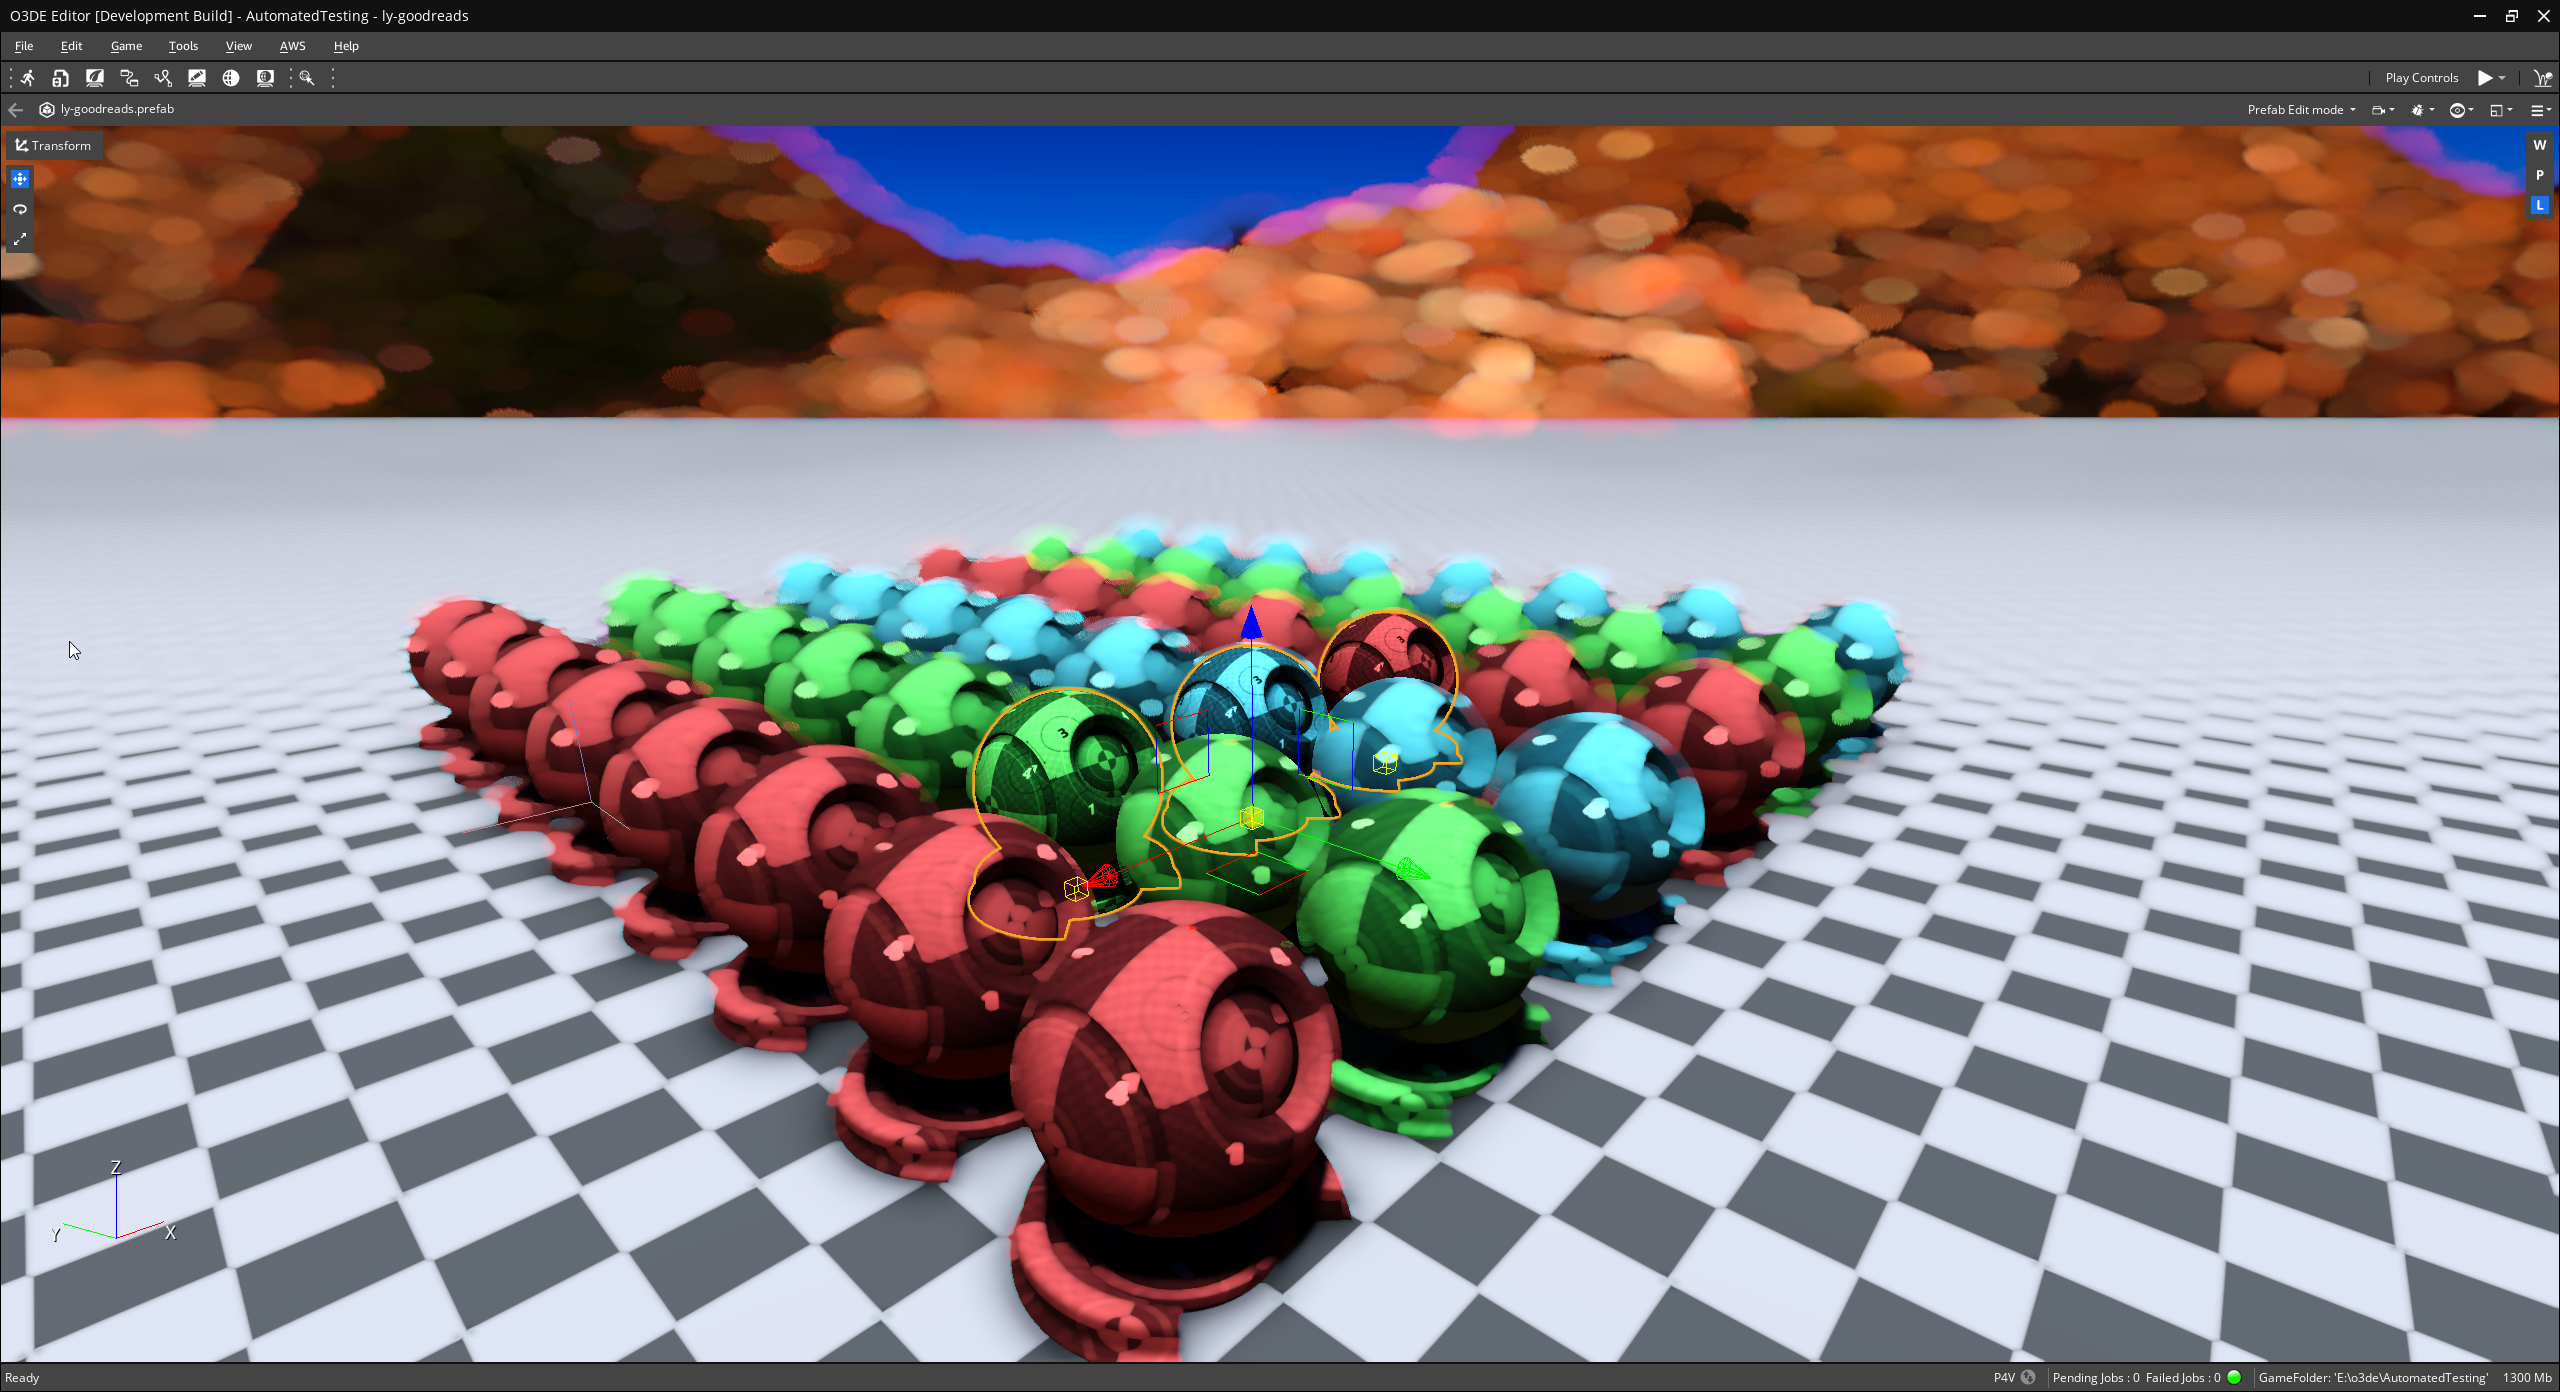
The output more visually interesting than the previous examples as we can see a non-trivial effect being applied to entities in a real-world situation. Here, the entity selection is rendered as normal whereas everything else in the viewport has the custom effect applied to it:
Now that we are actually sending entities to our editor state mask, let’s write the shader to visually display the contents of the entity mask:
ExampleEffect.azsl
#include <EditorModeCommon.azsli>
#include <EditorModeDepthTransition.azsli>

PSOutput MainPS(VSOutput IN)
{
    PSOutput OUT;
    const float mask = PassSrg::m_entityMask.Sample(
        PassSrg::PointSampler, IN.m_texCoord).g;
    OUT.m_color.rgb = float3(mask, mask, mask);
    return OUT;
}
One thing to note is that we can still see the selected entity outlining effect that is enabled by default. As this effect outlines the mask itself, the effect is still visible even with our effect engaged. We’ll leave disabling the selected entity outlining effect as an exercise for the reader.
Conclusion
And that’s all there is to it! You now have all of the knowledge you need to create your own custom feedback effects using the Editor Mode Visual Feedback system.