IN THIS ARTICLE
Customize Actor Asset Processing
This tutorial demonstrates how to use
Scene Settings to customize actor asset processing for Open 3D Engine (O3DE). An actor contains one or more meshes bound to a skeleton. You can use any actor asset for this tutorial. The primary 3D scene format supported by O3DE is .fbx, so it’s recommended to use an actor asset saved to a .fbx file. If you don’t have your own actor source asset, you can use a character asset from a provider such as
Mixamo .
Note:Understanding the best practices for creating actor source assets can mitigate issues you might encounter when processing actors for O3DE. For technical details about the data supported by actors, refer to the supported 3D scene data table.
| O3DE Experience | Time to Complete | Feature Focus | Last Updated |
|---|---|---|---|
| Beginner | 10 Minutes | Customized processing of actor assets from .fbx files with Scene Settings. | January 4, 2023 |
Preparation
Place your actor .fbx source asset in a
scan directory for your project, such as the Assets subdirectory, so it can be detected by
Asset Processor.
Processing an actor asset
When you placed your actor .fbx source asset in your project’s Assets directory, Asset Processor detected the asset, examined its contents, and processed it with a default set of rules. These default rules might be sufficient for simple actor assets, however, actors often require additional processing for custom normals and tangents, cloth meshes, root motion extraction, or coordinate space changes. To customize the rules that process the actor asset, do the following:
In O3DE Editor, locate your asset in Asset Browser. You can type the name of the asset into the search field at the top of Asset Browser to filter the list and locate your actor asset.
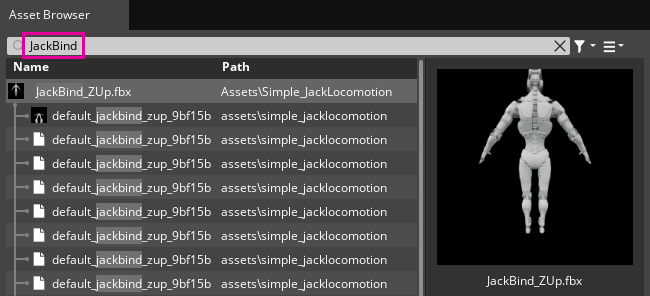
If your asset has already been processed, you might see a preview image of the asset, and a list of product assets below the
.fbxsource asset.Double-click the
.fbxsource asset and choose Edit Settings… from the context menu to open Scene Settings.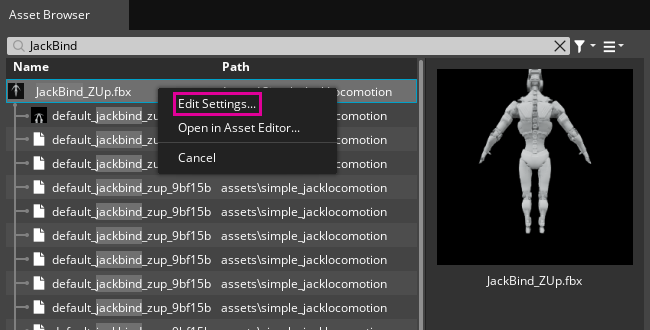
Select the Meshes tab.
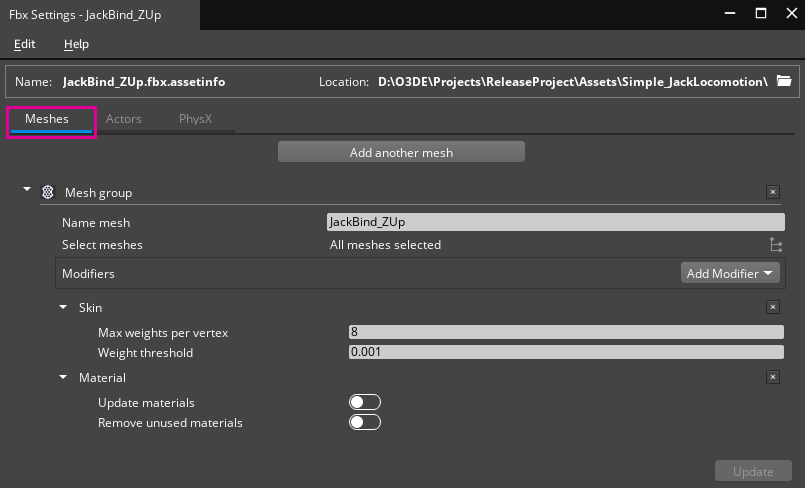
In the preceding image, there is one Mesh group in the Meshes tab. A mesh group produces a runtime optimized mesh asset. By default, all the meshes in the source asset are selected for the mesh group and are processed as a single mesh.
Additional mesh groups can be created by choosing Add another mesh. However, an actor entity can only have one mesh component. All of the actor’s meshes - which is to say, all the meshes that are bound to the actor’s skeleton - must be included in a single mesh group. The actor in this example has one mesh, though it’s common for actors to have many unique meshes.
The following table explains the important elements of the default mesh group for actors:
Element Description Name mesh This property is the name of the mesh group. All product assets of this mesh group use this string as a prefix for their name. The product assets appear in Asset Browser beneath the source asset. By default, the name of the source scene file is used. Select meshes The meshes selected for processing as part of the mesh group. Choosing the node select button allows you to select which meshes from the
.fbxsource asset to include in the mesh group. By default, all meshes in the.fbxsource asset are selected.Skin The Skin modifier is automatically added for meshes that are bound to a skeleton. The Skin modifier sets the max weights per vertex for the mesh, and the weight threshold for bone influences. The Max weights per vertex property has a default value of 8, so that up to 8 bones can influence each vertex in the mesh. The default Weight threshold is0.001. Any vertex weights that are lower than the threshold value are ignored.Material The Material modifier is automatically added to mesh groups. With the Material modifier, you can choose to update the materials for the processed actor, and remove unused materials that might have been previously processed for the actor. Note:If your actor has custom normals and materials that use normal maps, you might need to add Mesh (Advanced) and Tangents modifiers as well. To learn more about mesh modifiers, refer to the Meshes Tab topic in the User Guide.Choose the
file select button to view and select which meshes to include in the actor’s mesh group.
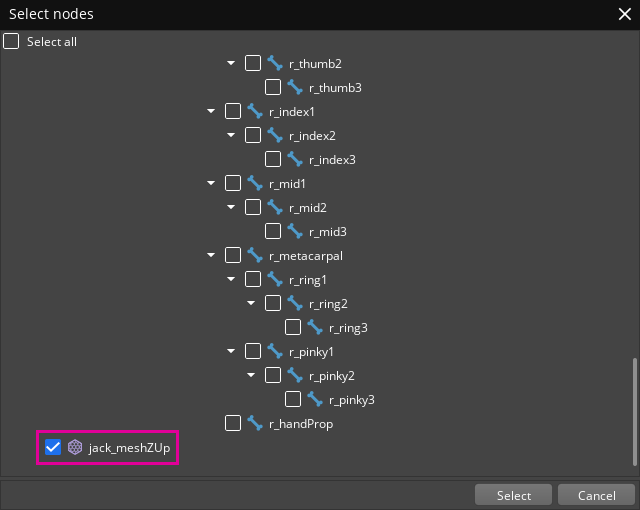
In the Select nodes dialog, select only the mesh nodes required by the actor. Mesh nodes are denoted by a mesh icon. Choose Select to complete the selection.
Select the Actors tab to specify the root joint of the actor’s skeleton.
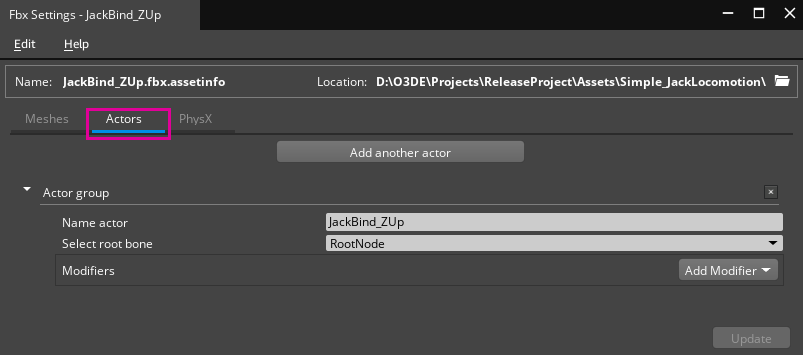
In the preceding image, there is a single Actor group.
The Name actor property is the name of the actor group. All product assets of this actor group use this string as a prefix for their name. The product assets of this actor group appear in Asset Browser beneath the source asset. By default, the name of the source scene file is used.
The Select root bone property specifies the root bone of the skeleton to process for the actor.
Click the Select root bone property to expose the list of bones. From the list, select the root bone of the skeleton.
 Note:The first node in the list is the scene root node, not the root of the skeleton. Make sure the bone you select is the root bone of the actor’s skeleton. The skeleton root bone is critical for animation and root motion. For more information, refer to the Data Driven Root Motion tutorial.
Choose Update to save the customized settings for the actor. The asset is immediately reprocessed with the new settings.
Locate the actor product asset in Asset Browser and drag the actor into the viewport to create an entity for the actor.
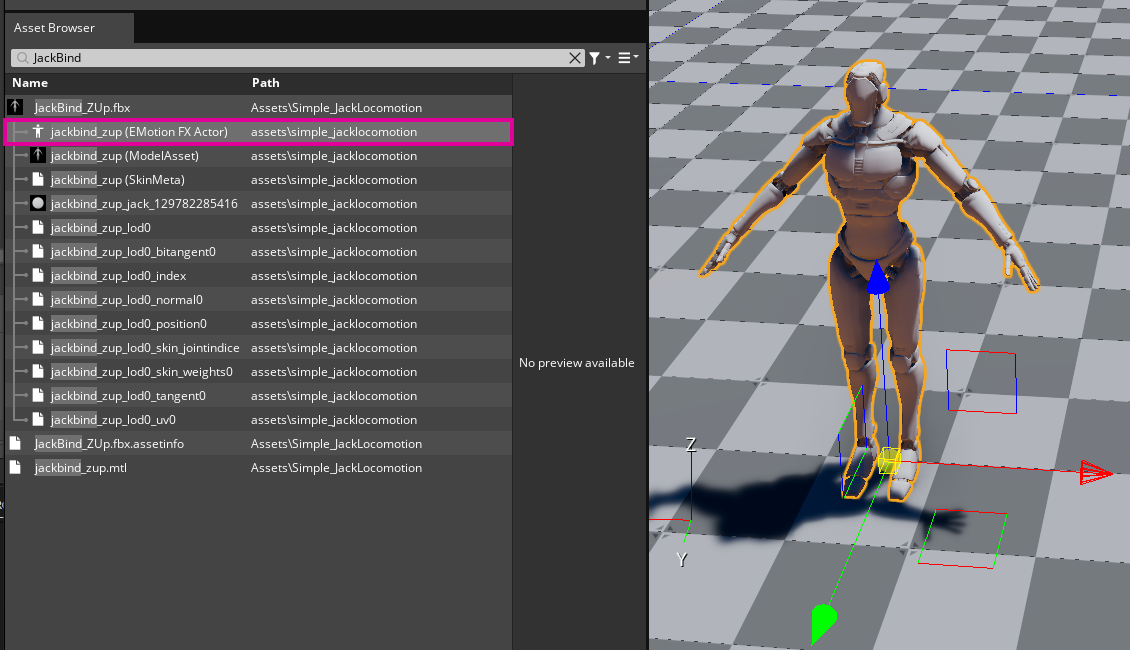
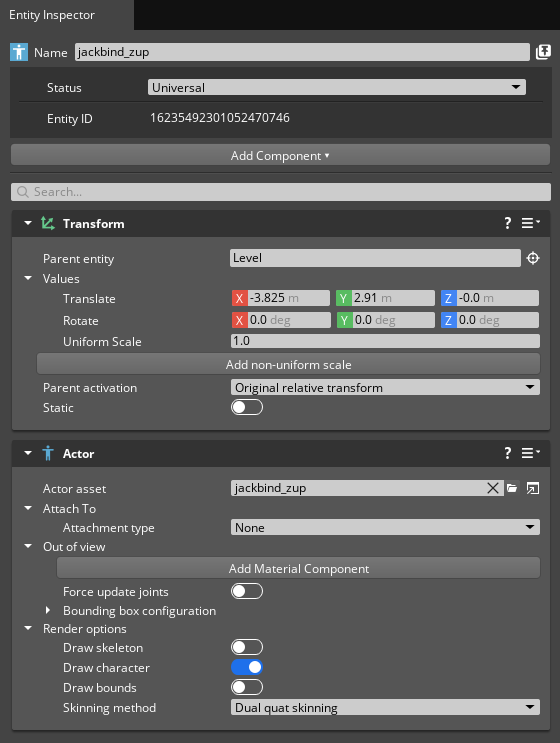
In Entity Inspector, note that the entity contains a single Actor component that references the actor product asset that you dragged into the viewport.
