IN THIS ARTICLE
Create Your Remote Repository
In this tutorial you will build upon the foundation of Open 3D Engine (O3DE) and use the remote repository template to manage and distribute projects effortlessly. You will learn how to package and share your projects remotely with GitHub or other version control platforms, promoting collaboration and accelerating project development.
In this tutorial you will use the O3DE command-line interface (CLI) tool from a command prompt. You can list all O3DE commands and get help on a specific command using the --help option:
cd <o3de-engine-directory>/scripts
o3de.bat --help
o3de.bat create-gem --help
Note:Allo3decommand options have abbreviations for convenience. Use the--helpoption with a command for details.
Create a repository
Create a new repository for your remote project and clone this repo to your local machine.
This version control repository link is where you upload your project repo-uri.
Here is an example of a GitHub repo URI:
"https://github.com/<YourGitAccount>/<RemoteProjectName>.git"
Create a remote repository repo.json configuration file
Navigate to scripts folder from the root of your Open 3D Engine (O3DE).
cd <o3de-engine-directory>/scripts
To create a remote repository configuration, you will need to provide the following information:
repo-path- the local path of your remote repository, this is where you cloned your repo.repo-uri- the URI of your repo.
o3de.bat create-repo --repo-path "C:\remote-repo" --repo-uri "https://github.com/<YourGitAccount>/<RemoteRepoName>.git"
Note:Use ./o3de.bat if you are using PowerShell.
./o3de.sh create-repo --repo-path "~/remote-repo" --repo-uri "https://github.com/<YourGitAccount>/<RemoteRepoName>.git"
The create-repo command performs the following actions:
Creates a directory with the remote repository name specified in the
repo-path, and creates arepo.jsonfile in the root of that directory.Creates three folders in your remote repository folder: Gems, Projects, and Templates. Make sure to place all associated objects in their correct folder type to avoid confusion later. This is what your remote repository folder will look like after this step:
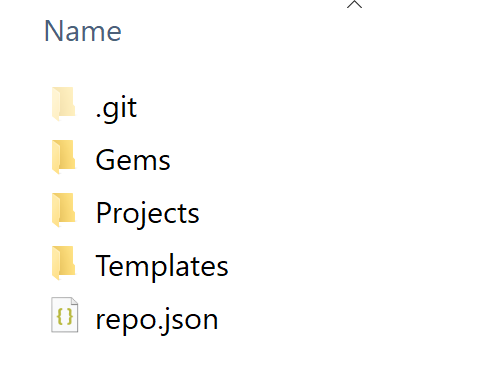
- For example: Gems should go inside the Gems folder, projects should be placed into the Projects folder, and templates should go inside the Templates folder.
Note:Remember to push your local changes to your remote version control repository.
(Optional) Create a gem release archive to add to your remote repository
To test your remote repo creation, you can create a Gem of your own and make it public to allow other users to download it. Skip this step if you already have a gem in your remote repository.
To create a Gem, you will need to provide the following information:
gem-path: The path to the directory where you would want your Gem to be stored (We recommend you choose a path inside the remote repository’s Gems folder)gem-name: Optional parameter that specifies a name for your Gem
o3de.bat create-gem --gem-path "C:\remote-repo\Gems\MyGem" --gem-name "MyGem"
The create-gem command performs the following actions:
- Creates a Gem with the provided name at the specified path. If you didn’t specify a name, O3DE will use the trailing directory name from the
gem-path. - Registers your Gem to the O3DE engine. You can now find your new Gem with the Gem name under the Gems tab in Project Manager.
Next, use the edit-repo-properties command to add your Gem to your remote repository.
Add your gem to your remote repository
To add a Gem to your project, you will need to provide the following information:
--repo-path: The path to your repo.json file--add-gem: The path to the directory of your Gemo3de.bat edit-repo-properties --repo-path "C:\remote-repo\repo.json" --add-gem "C:\remote-repo\Gems\MyGem"The
edit-repo-propertiescommand will register your gem with your remote repository’srepo.jsonfile under thegems_datafield.
In the next step, you will create a downloadable release archive for your Gem in order to share it with the world. Make sure you push all your changes before moving to the next step.
Create a release archive for your gem
The primary purpose of a release archive is to provide a well-defined and stable version of the software that can be easily shared, installed, and distributed.
In O3DE we provide the option for users to create a release archive with .zip format.
For security, O3DE uses sha-256 to hash files before creating the release archive. Every time you make a change to your Gem, including the repo.json file, the sha-256 hash will change.
Auto upload your release archive to Github
Upload your release zip to GitHub by providing a release tag_name and your GitHub token.
To allow auto update to GitHub you need to provide the following information:
--repo-path: the absolute path to your remote repository’srepo.jsonfile--add-gem: the path to the directory to where the actual gem you want to add is located--release-archive-path: the save location of generated zip. We recommend placing it outside of the repository so it isn’t checked in by accident--upload-git-release-tag: the tag_name GitHub uses when creating a release. We recommend a version number; for example “v1.0.0”
Note:
--release-archive-pathcommand can only be use after you call the--add-gemcommand. See below example:- Your GitHub Token must allow repo content read and write access. Press right button on mouse to paste your GitHub token.
o3de.bat edit-repo-properties --repo-path "C:\remote-repo\repo.json" --add-gem "C:\remote-repo\Gems\MyGem" --release-archive-path "C:\remote-repo\Gems" --upload-git-release-tag v1.0.0
O3DE Engine will prompt you for your GitHub token. GitHub releases need a tag. If the tag_name already exists on GitHub, the command will add your zip to the existing release. Otherwise, this command will publish the zip to a new release.
After uploading Gem to GitHub, other users should be able to download this Gem. In Project Manager remote sources add remote repository URI to download associated Gems. Otherwise use the O3DE CLI to download associated Gem.
Create a release archive using download prefix.
To upload your release to a different version control platform other than GitHub, you can use the --download-prefix command.
The
o3de.battool expects adownload prefixwhich is the URI for the folder your archive will be available in. For a release in a GitHub repository, thedownload prefixlooks like this:https://github.com/<YourGitAccount>/<RemoteRepoName>/releases/download/<ReleaseTag>
To create a release archive, you will need to provide the following information:
--repo-path: the absolute path to your remote repository’srepo.jsonfile--add-gem: the path to the directory to where the actual gem you want to add is located--release-archive-path: the save location of generated zip. We recommend placing it outside of the repository so it isn’t checked in by accident--download-prefix: the URI where your gem archive can be downloaded from. You must know where your zip will be available for download before you actually create the archive zip.
Note:--release-archive-pathcommand can only be used after you call the--add-gemcommand. See below example:
o3de.bat edit-repo-properties --repo-path "C:\remote-repo\repo.json" --add-gem "C:\remote-repo\Gems\MyGem" --release-archive-path "C:\remote-repo\Gems" --download-prefix "https://github.com/<YourGitAccount>/<RemoteRepoName>/releases/download/<ReleaseTag>"
Here is an example of where you should upload your release to GitHub (you can find this on your version control URI):
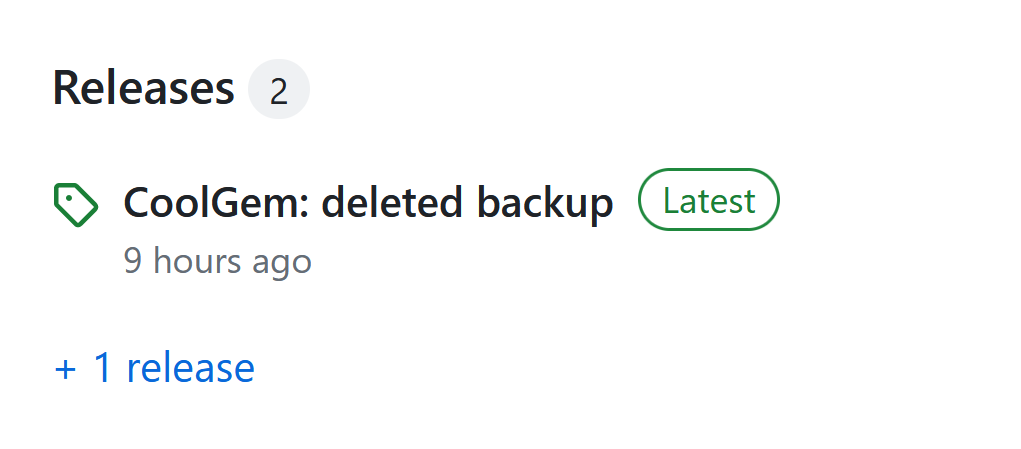
Here is where you would be setting your release tag (make sure this tag is the same as the last parameter you passed for the
--download-prefixarg):
Important:Make sure you know where your release will be available after uploading it to the version control platform. Once uploaded, you won’t be able to change thedownload_source_uriin yourrepo.jsonfile. If you input the wrong download path, you will need to repeat this step and re-zip the file and upload the release to version control platform again.
After you upload your Gem to the version control platform, other users that have added your remote repository will be able to download it using the Project Manager and o3de CLI. Users can navigate to Remote Sources and use your remote project URL to download associated Gems based on the download path you provided in this step.
Testing your remote repo locally
You can test your remote repo locally before uploading to your remote repository to make sure your remote repo works as expected by using a local file path.
You can test locally by creating another remote repository and Gem using the steps above and add the Gem to your new remote repository. Next, create a release archive for the new Gem using a local path for the download prefix:
o3de.bat edit-repo-properties --repo-path "C:\local-repo\repo.json" --add-gem "C:\local-repo\Gems\MyLocalGem" --release-archive-path "C:\local-repo\Gems" --download-prefix "C:\local-repo\Gems"
After performing the above steps you should be able to add the new remote repository using the local path file://c/local-repo and then be able to download MyLocalGem from the Gems tab in the Project Manager.
Use Python to host a local server for testing
Open a command window and change to the local repo folder that contains the
repo.jsonfile.cd c:\remote-repoStart a local Python server on port 8080.
python -m http.server 8080Use this below format for your
--download-prefix.http://localhost:8080/GemsHere is an example of where your download URI will be located:
http://localhost:8080/Gems/camera-0.1.0-gem.zipOpen the Project Manager and add a remote repository from the Engine > Remote Sources page. When prompted, use the URL for your local server which should be “http://localhost:8080/”
Note:Adding the repo may fail without the trailing slash, and the name should match therepo-uriin repo.json