IN THIS ARTICLE
PhysX Force Region Component
You can use the PhysX Force Region component to specify a region that applies physical force to entities. For each physics simulation frame, the component applies force to entities that are in the region’s bounds. You can use this component to simulate effects such as simulating gravity, slowing down, or deflecting an entity to another direction.
To create a force region, you must do the following:
- Enable the PhysX gem for your game project
- Add a PhysX Primitive Collider component to the same entity
- For the PhysX Primitive Collider component, you must select the Trigger property for the force region to work
The PhysX Primitive Collider component’s shape, size, and orientation represent the region that applies force to incoming entities.
Note:A PhysX Mesh Collider component can also be used, which requires a PxMesh asset. But if the collider inside the asset isn’t a convex mesh (for example, it’s a triangle mesh), the collider won’t work as a trigger for collisions.
Topics
PhysX Force Region Component Properties

| Property | Description |
|---|---|
| Visible | The component always appears in the viewport, even if the entity isn’t selected. |
| Debug Forces | A debug arrow draws in gameplay mode. The debug arrow indicates the direction of the net force for each entity inside the force region. |
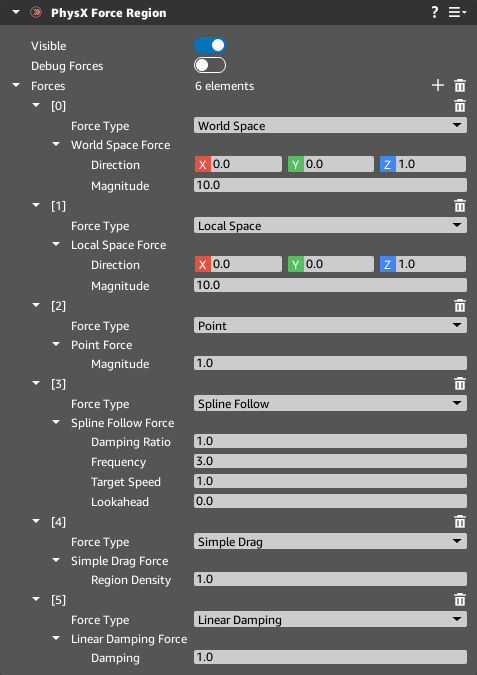
| Forces | Specifies the force types that act in the force region. You can add multiple force types for the same component. |
Force Types
You can add multiple force types to the component. When an entity enters the force region, the entity moves according to the net value of the forces that you specify.
Contents
Linear Damping
Applies a force in the opposite direction to an entity’s velocity. For example, you can create a force that simulates a swamp or mud.
| Property | Description |
|---|---|
| Damping | The amount of damping to apply. You can’t specify negative values. Specify higher values to apply more damping. Specify 0 for no damping. |
Local Space
Applies a force in local space, relative to the force region’s orientation. For example, you can create a force that simulates a hair dryer or a vacuum cleaner.
| Property | Description |
|---|---|
| Direction | The direction of the force in the local space of the force region. You can specify a value from -1000000 to 1000000, but O3DE Editor normalizes the value to a range of -1 and 1. |
| Magnitude | The amount of force to apply. Specify a negative value to apply the force in the opposite direction. |
Point
Applies a force relative to the center of force region. The magnitude determines if the force is inward or outward. For example, you can create a force that simulates an explosion or a black hole.
| Property | Description |
|---|---|
| Magnitude | The amount of force to apply. Specify a positive value for an outward force and a negative value for an inward force. |
Simple Drag
Applies a force that simulates air resistance. Simple Drag always applies force in the opposite direction of colliding entities. Larger and faster entities experience more drag. Entities are approximated as spheres.
| Property | Description |
|---|---|
| Region Density | The density of the volume. Specify higher values to increase the drag force. You can specify only positive values. |
Spline Follow
Applies a force to make entities follow a spline. The force uses a proportional-derivative (PD) controller that simulates a spring moving along a spline. For example, you can create a force that simulates a water slide.
Note:For the force region entity, if you change the Scale property of the Transform component, the scaling must be uniform so that the x, y, and z scale values match. If scaling isn’t uniform, the spline doesn’t correctly reflect the path of the force. The end of the spline must be outside the force region so that entities can exit after following the spline.
| Property | Description |
|---|---|
| Damping Ratio | Slows down the vibration of the entity when it enters the spline. The higher the value, the faster it slows down the vibrations. A value of 1 quickly slows down vibrations around the spline. |
| Frequency | The frequency of the vibration when the entity enters the spline. |
| Target Speed | The speed that the entity attempts to reach as it travels through the nodes of the spline. Specify a negative value to apply the force in the opposite direction. |
| Lookahead | The distance, in meters, that entities look ahead in their path to reach a node on the spline. The Lookahead value determines how far ahead entities look for the next node to steer towards. At each physics simulation frame, the entity in the spline changes its direction to realign itself to the identified node. If spline nodes are close together, you can specify a smaller Lookahead value so that entities can detect the next node. If nodes are far apart, you can specify a higher Lookahead value so that entities can detect the next node. |
World Space
Applies a force in world space. World space force doesn’t take into account an entity’s orientation. For example, you can create a force that simulates gravity.
Note:You can define the direction for world space so that it always applies force in the direction that you want, regardless of the colliding entity.
| Property | Description |
|---|---|
| Direction | The direction of the force in world space. |
| Magnitude | The amount of force to apply. Specify a negative value to apply the force in the opposite direction. |
Note:When you select a force type, remember the following:
For Simple Drag, you can’t define the direction of force. Simple Drag always works in the opposite direction of the entity’s movement. In contrast, you can define a direction of force using World Space, which always acts in the direction that you specify, regardless of the direction of the moving entity.
To determine how much force to apply, Linear Damping takes into account the colliding entity’s velocity and mass but not its shape. In contrast, Simple Drag takes into account the colliding entity’s velocity, cross-section area, and the Region Density of the force region.
Creating a Force Region
You can create a force region so that force applies to another entity that enters the region.
To create a PhysX Force Region component
In O3DE Editor, create an entity.
Enter a name for the entity, such as ForceRegion.
In the Entity Inspector, choose Add Component and select a PhysX Force Region component.
In the PhysX Force Region component, choose Add Required Component and select the PhysX Primitive Collider component.
In the PhysX Primitive Collider component, choose Add Required Component and select the PhysX Static Rigid Body component.
For the PhysX Primitive Collider component, do the following.
Select the Trigger property.
For Shape, select a shape such as Box.
For the PhysX Force Region component, do the following.
Select the Visible and Debug Forces properties.
For Forces, click the + icon and for Force Type, select a force such as Local Space.
For Magnitude, enter a value such as 20.
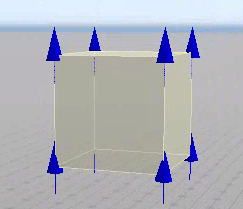
Blue arrows appear on the entity that indicate the direction of the force.

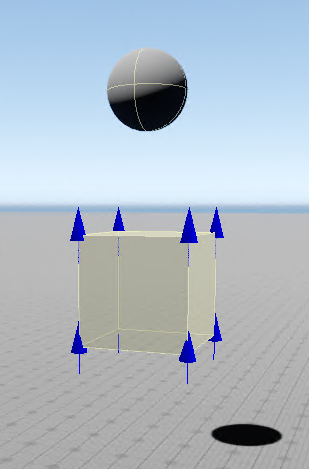
To collide an entity with the force region, create a dynamic entity named Sphere and attach the PhysX Primitive Collider and PhysX Dynamic Rigid Body components. These components enable the entity to interact with other PhysX entities.
(Optional) Add a Mesh component and, for Mesh asset, select a mesh asset, such as a
_sphere_1x1.fbx.Select and drag the Sphere entity so that it’s above the force region.

After you create your dynamic entity, press Ctrl+G to enter gameplay mode. Example
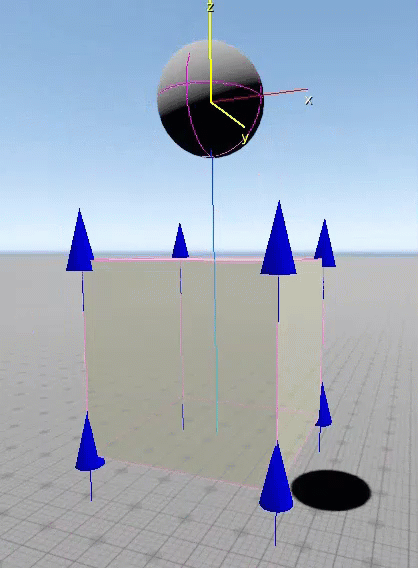
The sphere falls and collides with the force region. The force region applies force and pushes the sphere in the opposite direction.

To leave gameplay mode, press Esc.
Note:To display PhysX debug visualizations, see Debugging PhysX. For more information about using PhysX components, see Simulating physics behavior with the PhysX system.
