IN THIS ARTICLE
Positioning a Camera
You can control a camera’s position and rotation to manipulate the facing direction during a sequence. These can be animated over time to make the camera dynamic. If you have multiple cameras, you can also control if the cameras switch immediately or if they should blend over time.
Animating the Camera
As a recommended workflow, enter record mode and then animate the camera while viewing from the specific camera’s perspective. For more information, see Using Record Mode.
Note:You can still manipulate the component entity camera within the level from the default editor camera. However, this method makes it more difficult to determine where the camera is facing.
Example
In a level, you have a component entity with a Camera component attached. This component entity is part of your sequence.
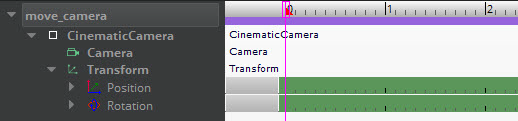
By default, the Transform component attached to the entity has the Position and Rotation tracks in the sequence.
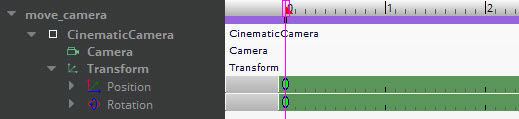
- To maintain the current position and rotation of the game object, add animation keys on both tracks at
0on the timeline.
Select and drag the playhead to a different location on the timeline.
Move the Track View window to the side or dock it so that it’s open but not blocking the viewport for the currently open level
Click the Start Animation Recording icon to enter record mode.
In the left-corner of the viewport window, right-click Perspective and choose Camera and then specify the camera that is part of your sequence. The text will change from Perspective to Camera entity: NameOfYourCamera.
While you are viewing from the perspective of the camera, as you move in the level, the camera moves as well. This includes any rotations. In record mode, this adds animation keys at the current playhead location.
Move the playhead when you need to add another animation key in the timeline and then move the camera view around in the level.
When finished, Click the Start Animation Recording icon again to exit record mode.
Blending Cameras
By default, when you switch between cameras, the change is immediate. However, if you want a smoother transition, you can blend the cameras together. You can blend a camera in and out of the camera-controlled sequence, or blend between cameras that are part of the sequence.
Blending from Game Camera to Sequence Camera
To use the default game camera
Under the Director node, for the Camera track, add an animation key to the timeline.
Double-click the animation key and verify that the Camera property is set to None.
Add another key on the timeline for the Camera track. You can add the key at the beginning or end of the sequence, or both.
Double-click the animation key before a camera change, and for Blend time, specify a value in seconds. This value determines how the current camera will blend into the next.
Note:This creates a blend between the game camera to the sequence camera, or from the sequence camera back to the game camera, depending on where you place the key and adjust the Blend time.
Blending Cameras within a Sequence
Blended camera keys will blend the position, rotation, and field of view of the current camera into the next camera on the Camera track. This allows the cut to appear as a continuous single camera motion rather than an abrupt jump cut.
To create a blended camera key
Select the key for the first camera of the blend.
Double-click the key and do the following:
For Camera, select the camera that you want to start.
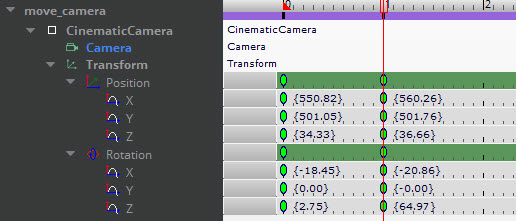
For Blend time, specify a value greater than
0. This is the time in seconds over which the blend will occur. ExampleIf you add the first camera as a track view node, then you must add at least one animation key for the Position, Rotation, and Field of View tracks when using blended sequence cameras.
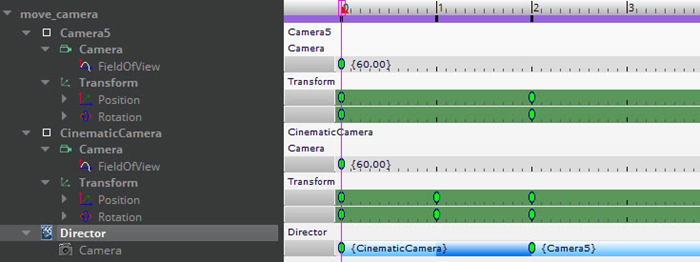
In this sequence, the Camera track starts at
0seconds for CinematicsCamera and will blend into Camera5 at2seconds.